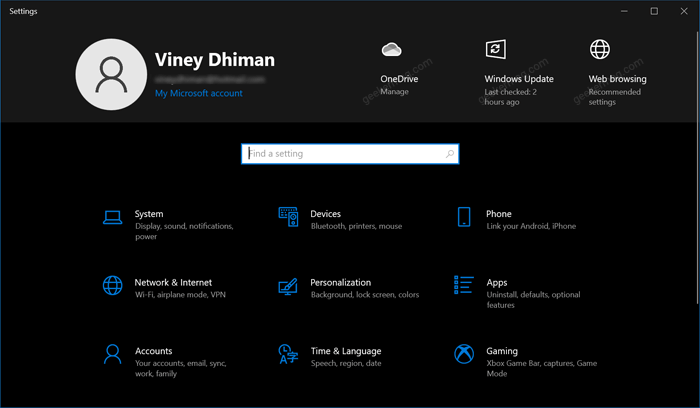
You can check the following screenshot for a clear idea Some users find it useful as it let you quickly head over to particular settings. For example, clicking One Drive opens the One Drive app, clicking Windows Update takes you Windows Update section. Apart from this, if you click on Web Browsing it shows you the best-recommended browser settings for Windows 10. On the other hand, some users find it annoying and want to disable the header ad banners in Windows 10. In case, you made up to this blog post then chances are you also seeing the same header ad in Settings, right? And either you want to enable the header banner if it’s not available for you or want to disable it Unfortunately, there’s no setting available in Windows 10 to enable or disable the Header ad banner in Windows 10. But that doesn’t mean it’s impossible. You can take the help of a third-party program called VIVE to achieve this thing
Enable or Disable Header Ad Banner in Windows 10 Settings app
- Download Vive Tool for Windows 10 from Github.
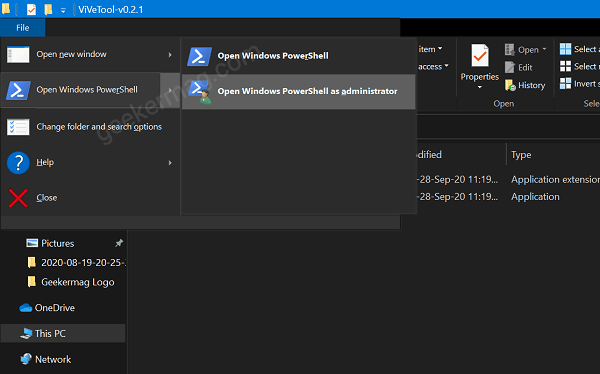
- Extract the files and then Open the Vive Tool folder.
- Next, you need to click on the File > Open Windows PowerShell > Open Windows PowerShell as administrator.
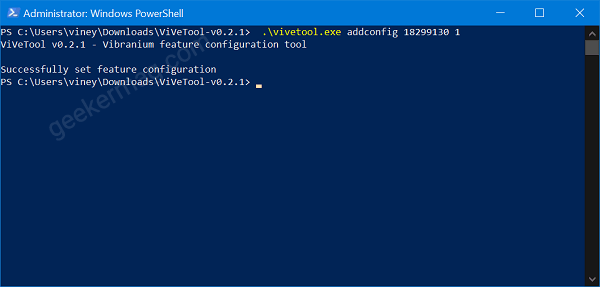
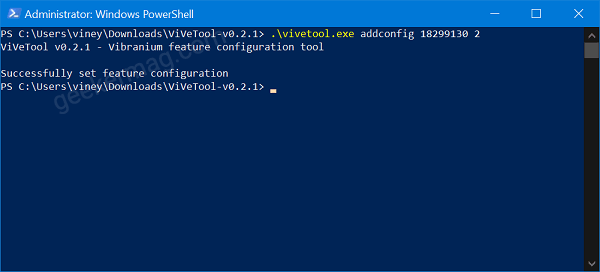
- According to your requirement (enable or disable), you need to copy-paste the command listed below and hit Enter. Disable Header ad in the Settings app Enable Header ad in the Settings app
- Once you see the OK status, reboot your computer to apply the changes. As simple as that! You can check out the following YouTube for steps: Are you seeing a header ad in Windows 10 after installing version 2004? What you’re seeing in it? Do you find the workaround in this blog post useful? Let us know in the comments.