Expand “Browse Post Topics” below to go straight to a topic.
How to Use DISKPART to Create a Partition and Assign a Drive Letter.
DISKPART is one of the most useful CMD commands for System Administrators. This section covers steps to use this must-know tool to create a new partition and assign a drive letter to the partition. To use DISKPART, you need to open Command Prompt as administrator. Here are the steps to run CMD as Administrator…
Type command prompt in the search box. Then, from the search results, right-click Command Prompt and select Run as Administrator.
When you receive a User Access Control (UAC) confirmation, requesting you to allow the “app to make changes to your PC”. On the UAC prompt, click Yes.
How to Create a Partition with DISKPART
After opening Command Prompt as administrator, use the steps below to create a partition.
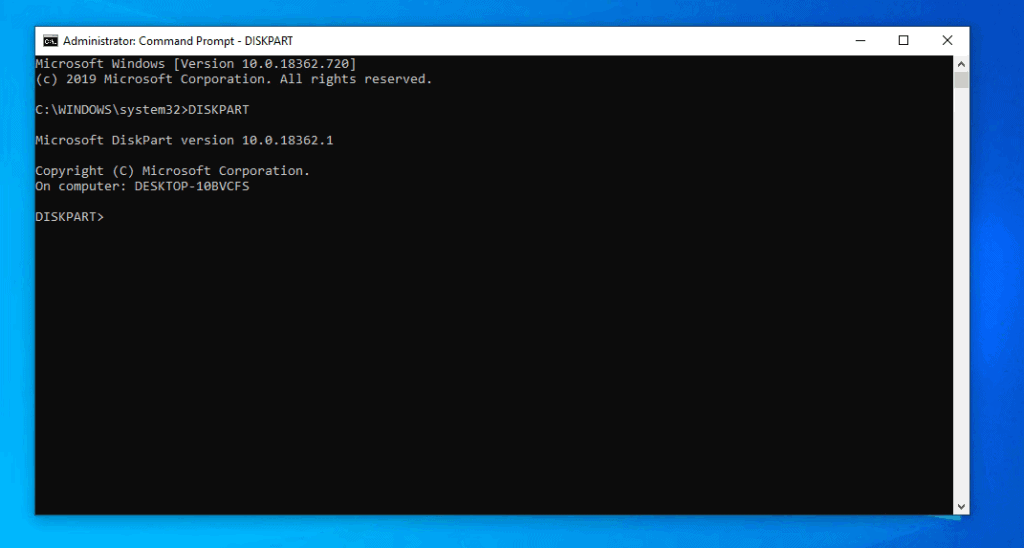
On the CMD Prompt, to open the DISKPART command prompt, type the command below and press enter.
The DISKPART CMD prompt will open.
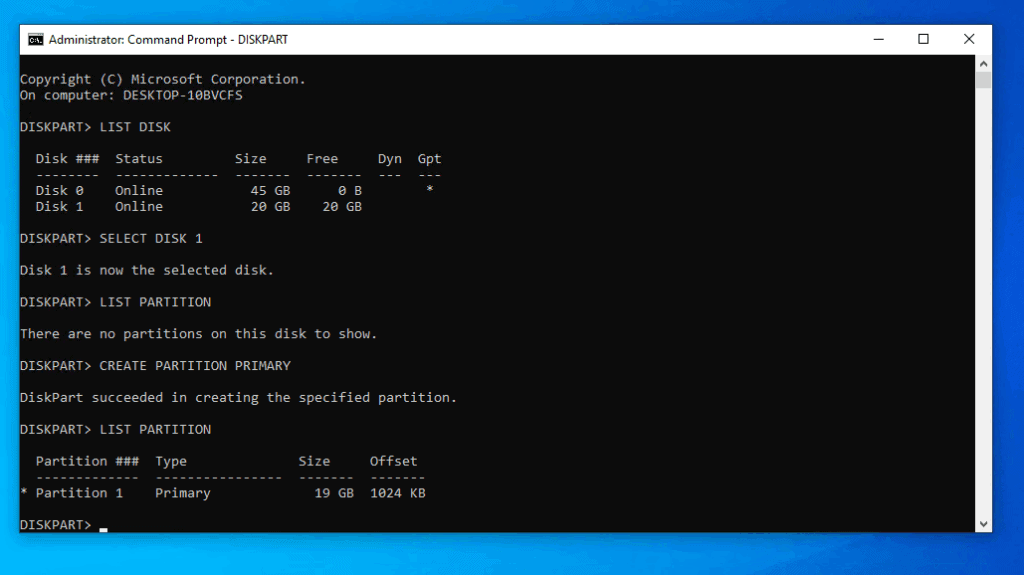
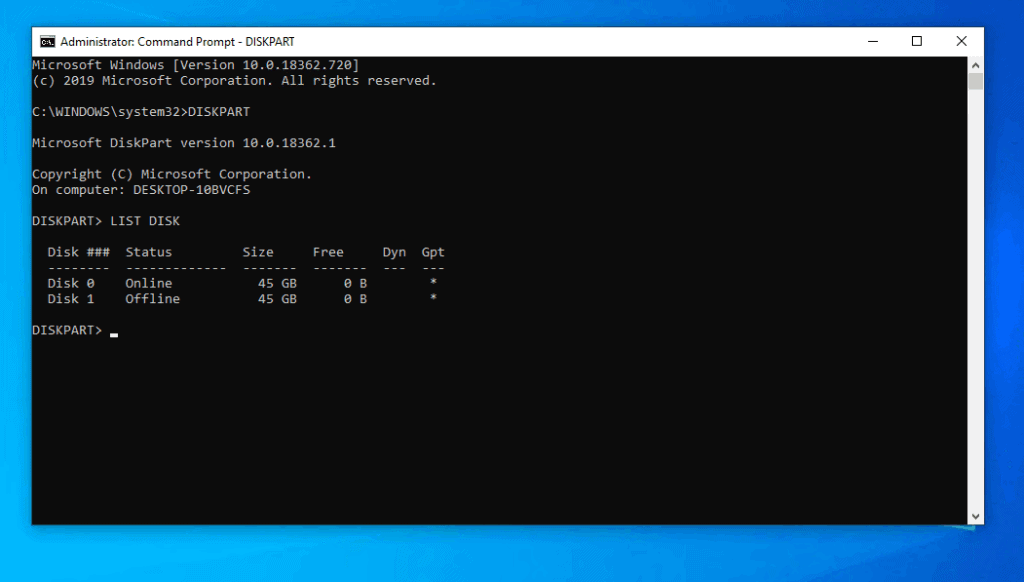
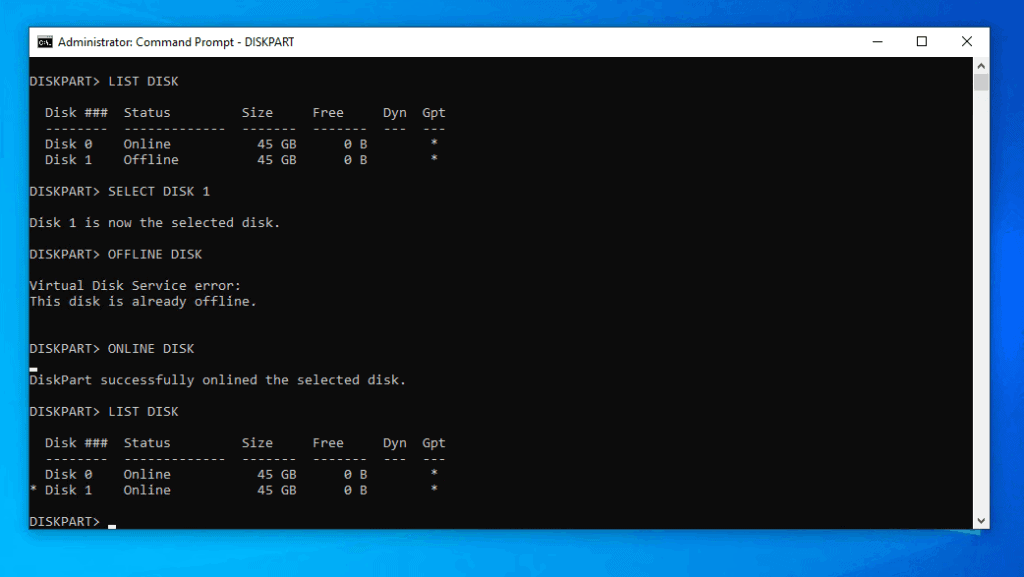
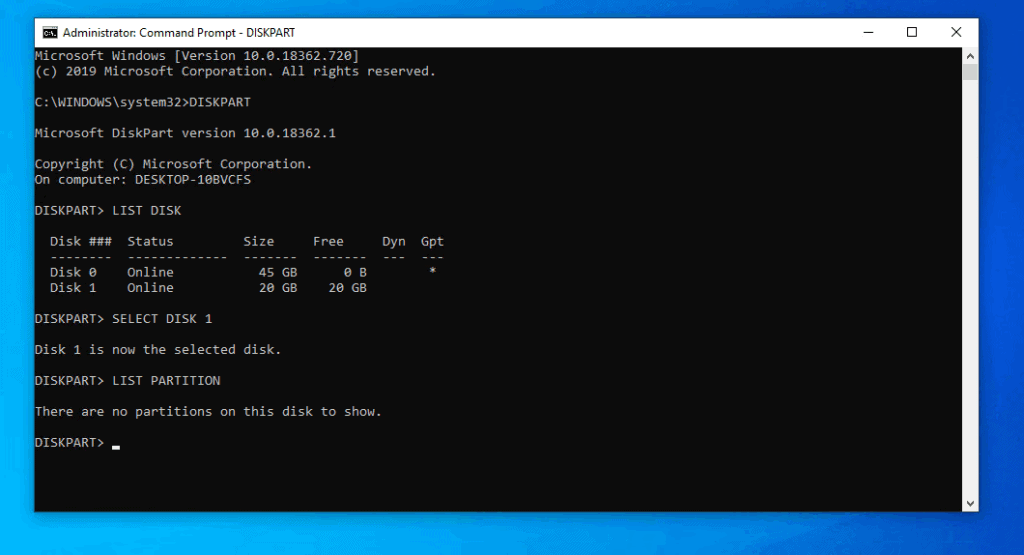
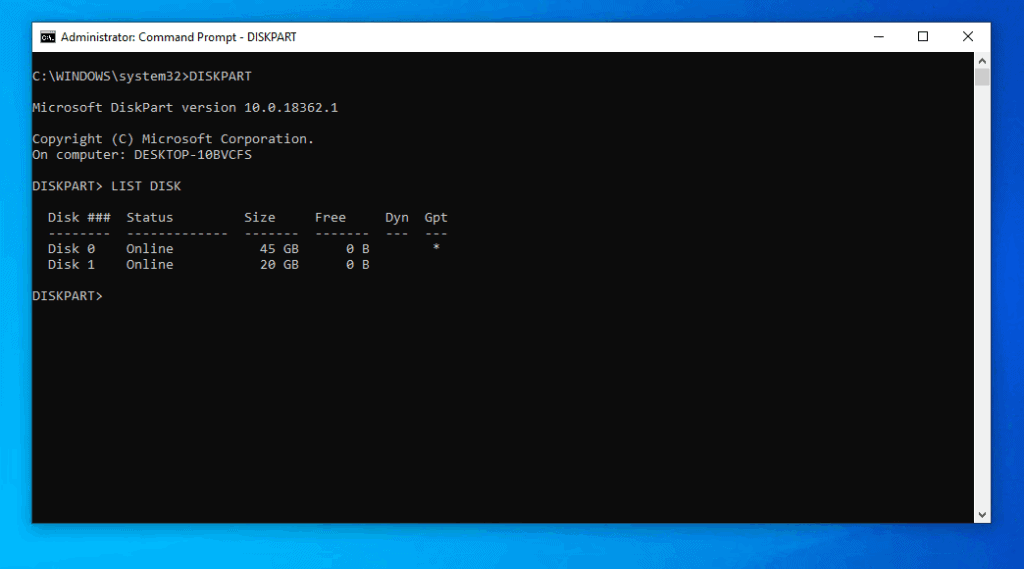
On the DISKPART prompt, use the LISK DISK command to list all available disks – type the command and press enter.
The LIST DISK command displays all the disks on your PC. The next step is to select the disk you want to use DISKPART to create a partition on.
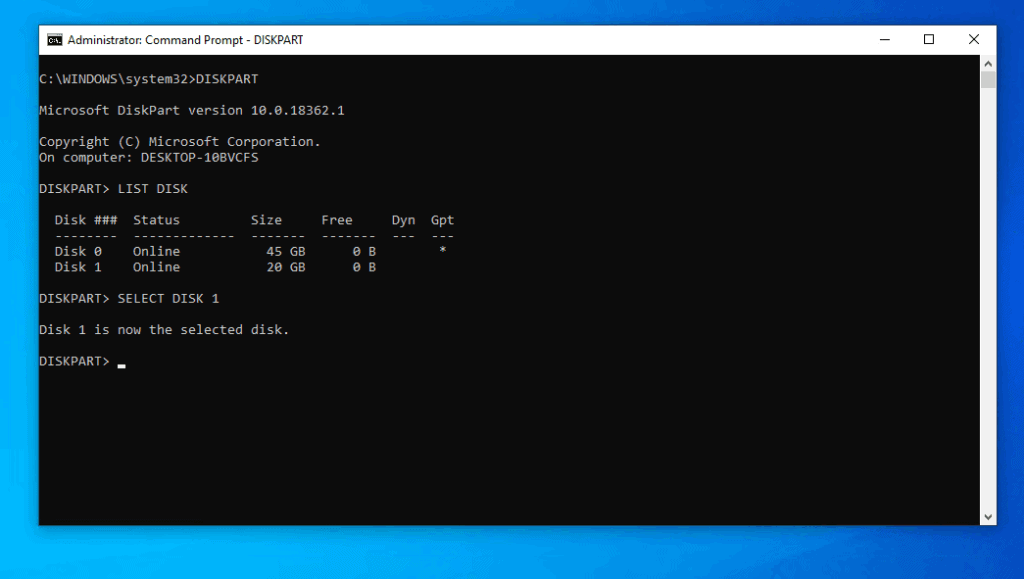
To select the disk, use the command below – enter the command and press enter.
The last command should return “Disk # selected successfully”
If your disk is Offline, you need to take it Online. Use the command below.
The command should return “DiskPart successfully onlined the selected disk”. To confirm that the disk is now online, run the LIST DISK command.
To be sure that your disk is still selected, run the SELECT DISK command again. Then, to see if there are any partitions on the selected disk, run the command below – this will list all available partitions on the selected disk.
If there are partitions on the disk, they will be displayed. Otherwise, the command will return “There are no partitions on this disk to show”.
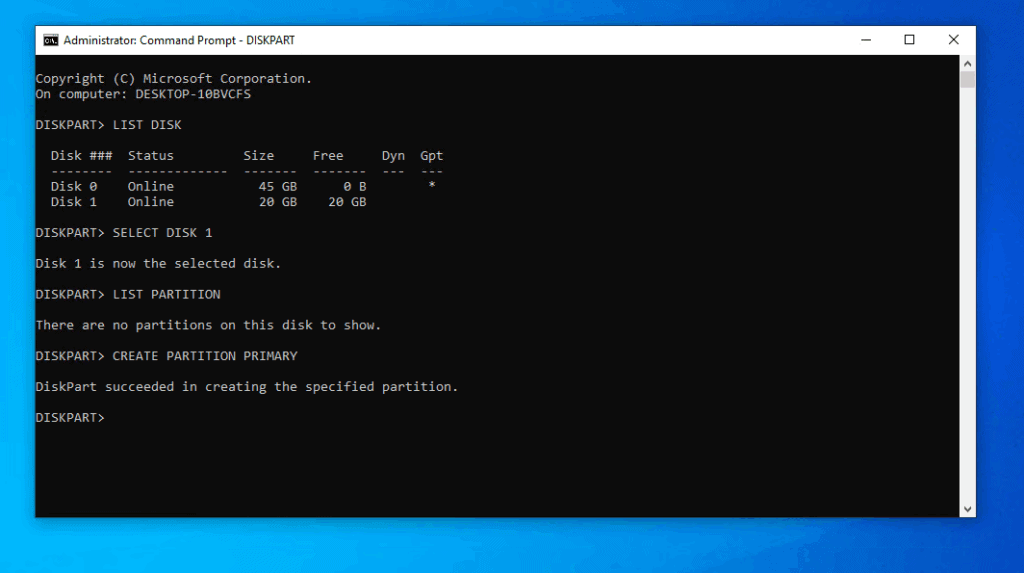
To use DISKPART to create a partition, type the command below. Then, press enter. Before you press enter, read the notes below the command.
The above command will create a Primary partition. If you want to create an Extended partition, replace PRIMARY with EXTENDED. In the command, n is the size of the partition in Megabytes. To create a partition with all available disk space, DO NOT specify the SIZE parameter. To read more about disk partitions, read this How-to-geek guide – Hard Disk Partitions Explained.
Here is a real sample command – this DISKPART command creates a partition with all available spaces on the selected disk.
If DISKPART returns “DiskPart succeeded in creating the specified partition”, the partition was created. Otherwise, if it returns an error, read the error details and fix the problem.
To confirm that the partition was created, run the LIST PARTITION command again. The partition will now be listed!
How to Use DISKPART to Assign a Drive Letter
After creating a partition, you need to assign a drive letter to the partition. Here are the steps…
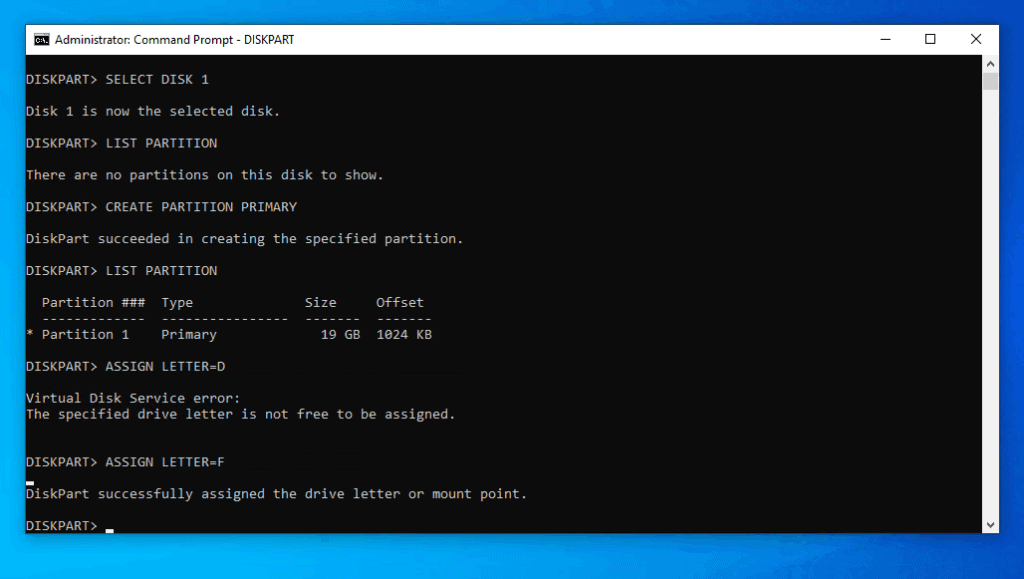
Still on the DISKPART prompt, type the command with the format below.
N is your drive letter. The command below assigns letter D to the partition you created in the last section…
If the drive letter is not available, you will receive an error message – try another letter. In the command shown in the image below, I used drive F and the drive letter was assigned successfully!
How to Use DISKPART to Delete a Partition
If you can DISKPART to create a partition, you can also use DISKPART to delete a partition. Here are the steps…
Open Command Prompt as Administrator. Then, on the CMD prompt, type this command and press the enter key.
The DISKPART prompt will open.
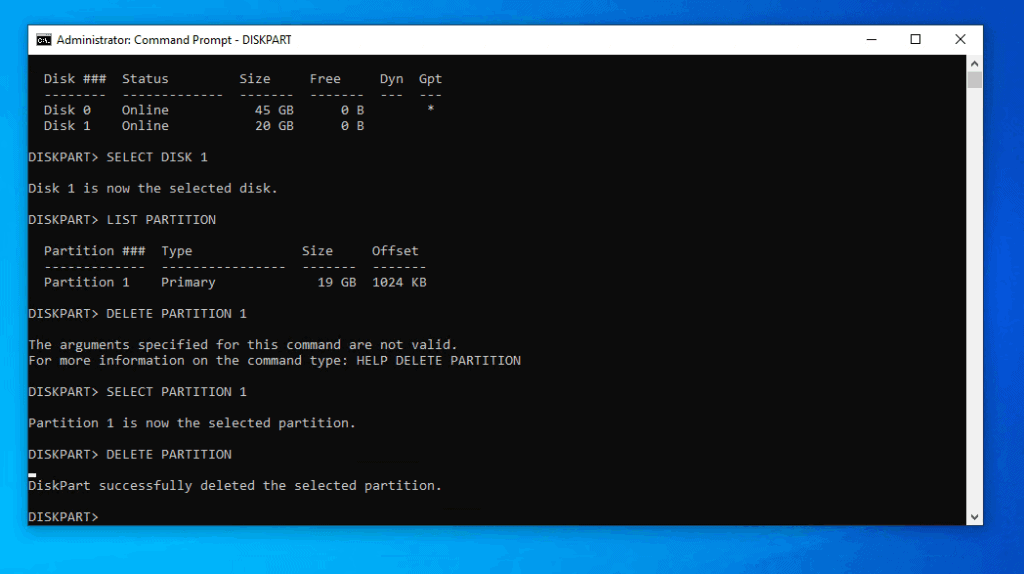
On the DISKPART CMD prompt, type the LIST DISK command. Then, press enter.
The LIST DISK command lists all the disks on your PC. The next step is to select the disk you want DISKPART to delete a partition from.
To select the disk, use the SELECT DISK command. Here is an example command that selects disk 1.
Replace 1 with your disk #. The next step is to list partitions on the select disk.
Use the command below to list available partitions on the disk.
Then, select the partition you want to delete with this command…
Replace 1 with your partition #
Finally, to use DISKPART to delete a partition, type the command below and press enter.
To see how to run the commands above, see the image below…
As you can see, it is very easy to use DISKPART to create or delete a partition! I hope you found this Itechguide helpful. If you were able to use DISKPART to create or delete a partition by following this guide please let us know at Itechguides Community Forum. Alternatively, if you have any questions or want to share the method that worked for you, also post them at Itechguides Community Forum. Our team of forum staff and other members will be delighted to answer your questions. Finally, for more Command Prompt Itechguides, visit our Windows Command Prompt page.