In the second section, you will learn how to reinstall Windows Media Player if it is not available in Windows 10. Furthermore, the guide covers other topics like changing Media Player options, adding and removing music from the Library, and more.
How To Open Windows Media Player in Windows 10
The most logical place to start this Windows 10 Media Player help guide is to show you different ways to open Windows Media player. This section teaches you three methods to open Windows Media Player in Windows 10.
How To Open Windows Media Player From Windows 10 Search
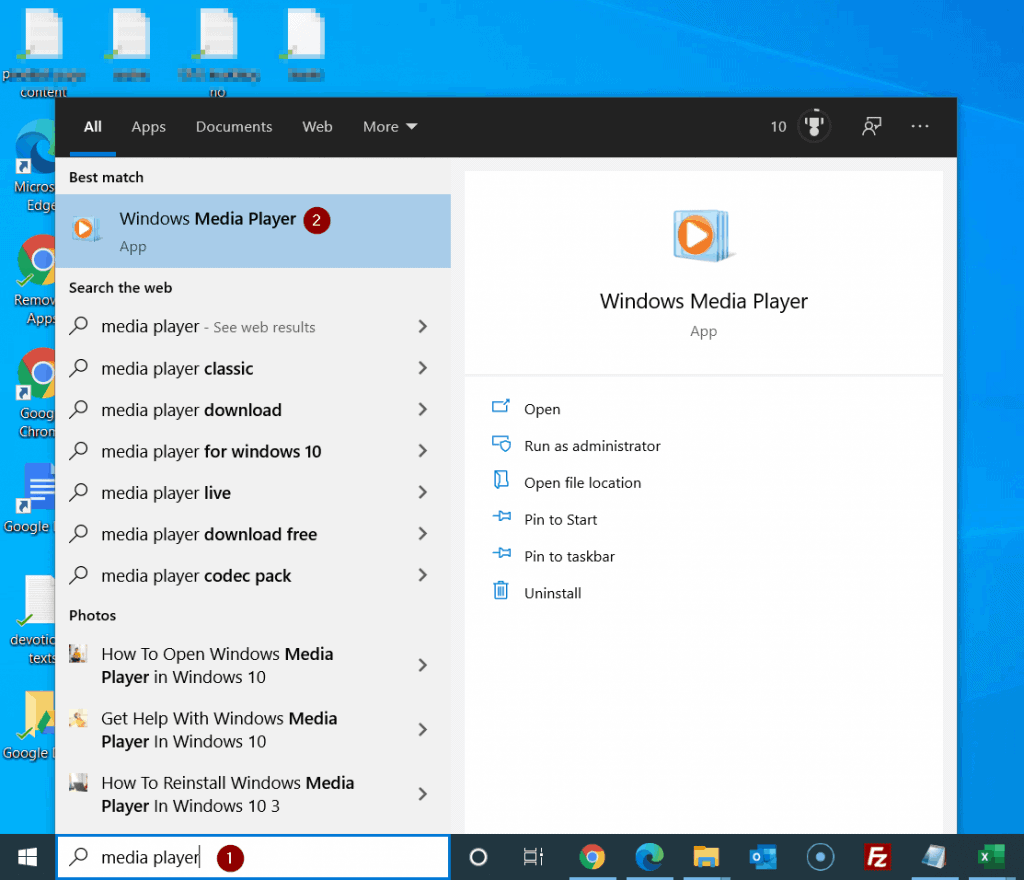
The fastest method to open Windows Media Player is via search. Here are the steps.
How To Open Windows Media Player From Start Menu
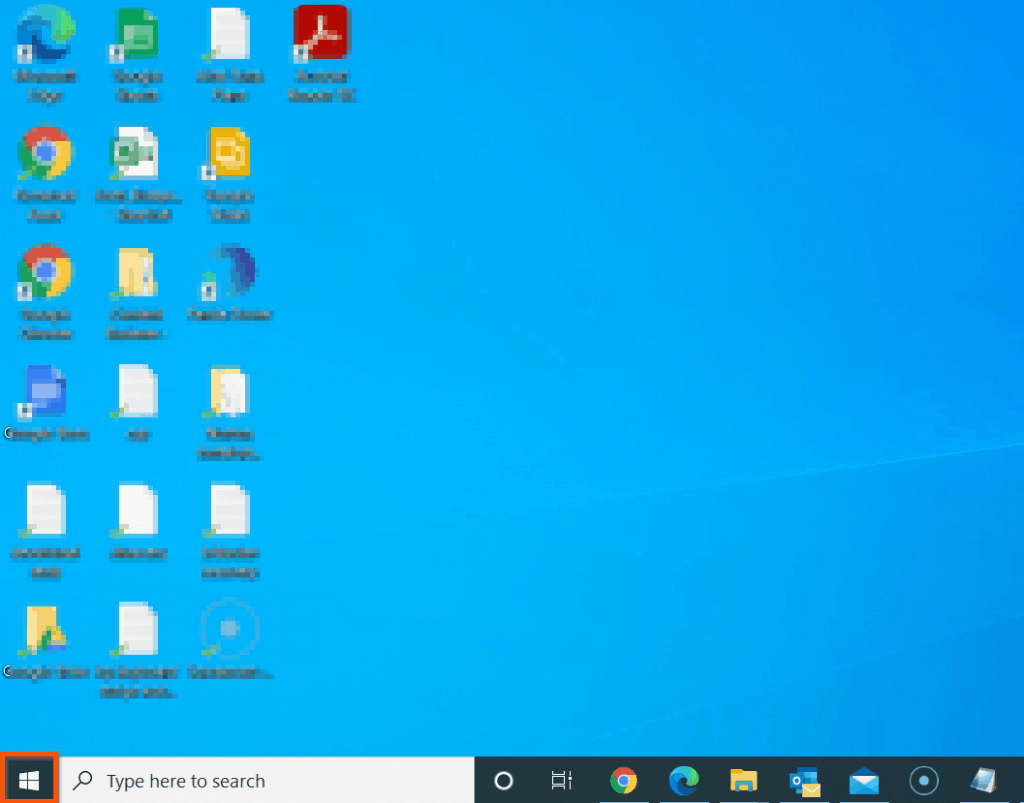
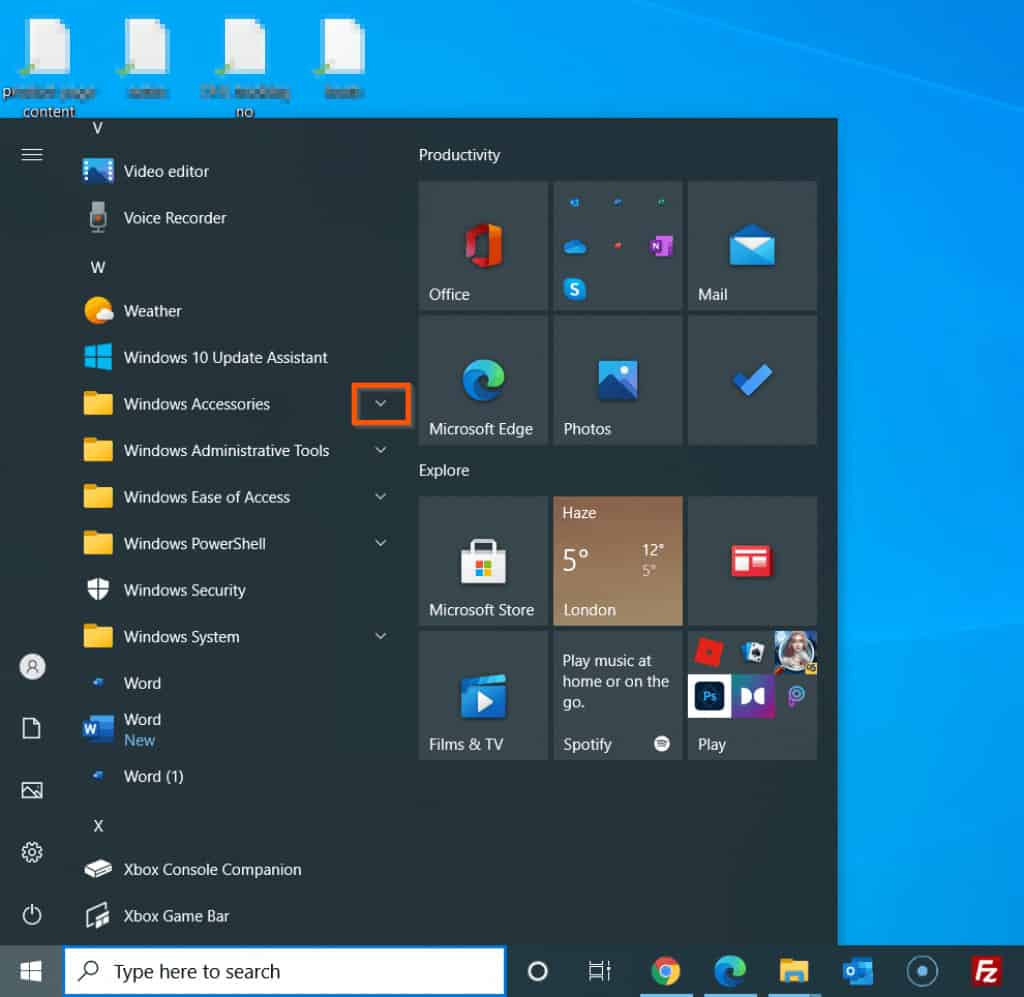
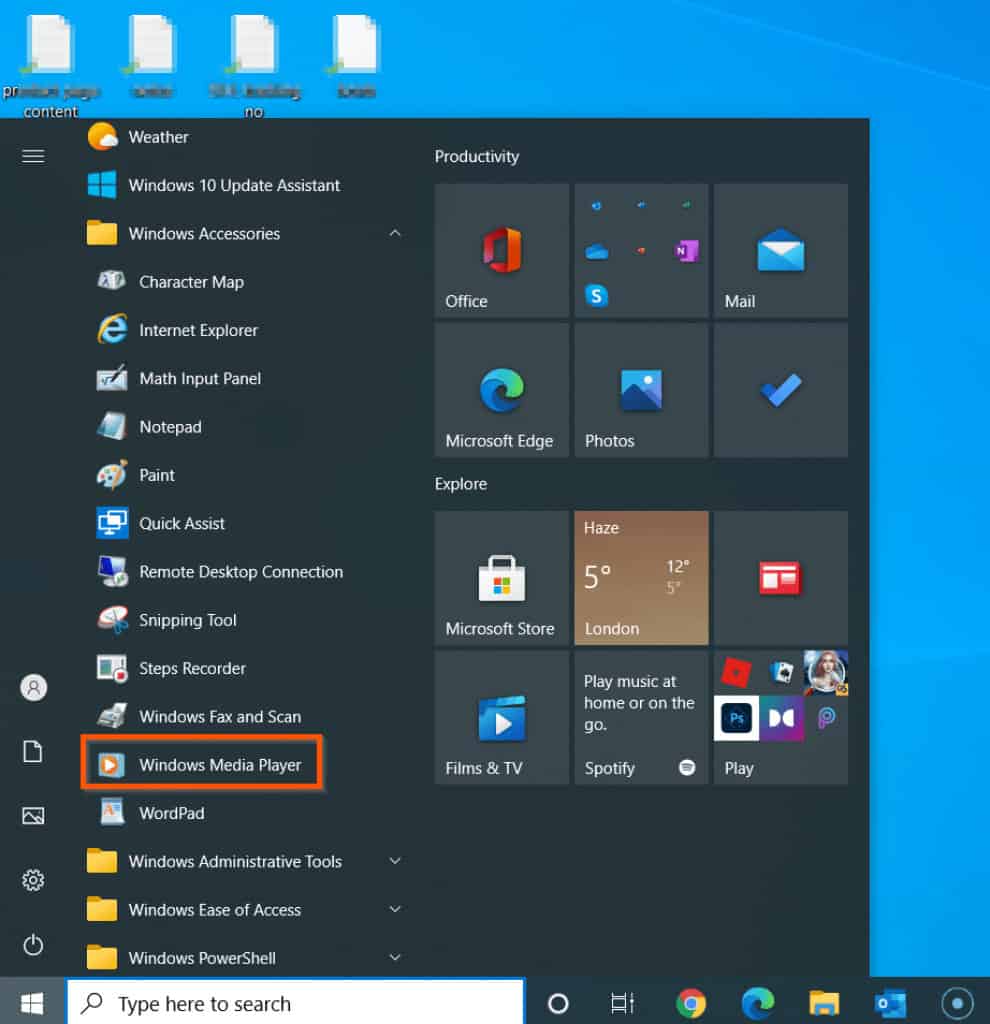
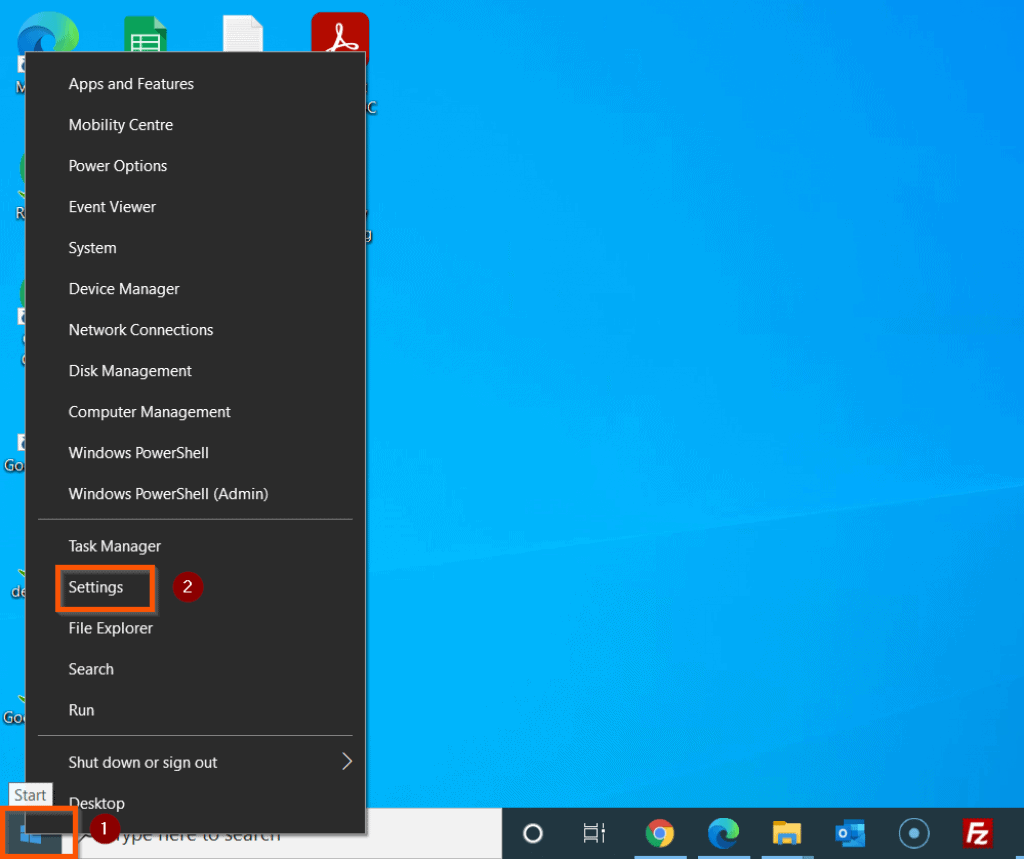
Another method to open Windows Media Player is via the Start Menu. Follow the steps below to open Windows Media Player with this method:
How To Open Windows Media Player From Run
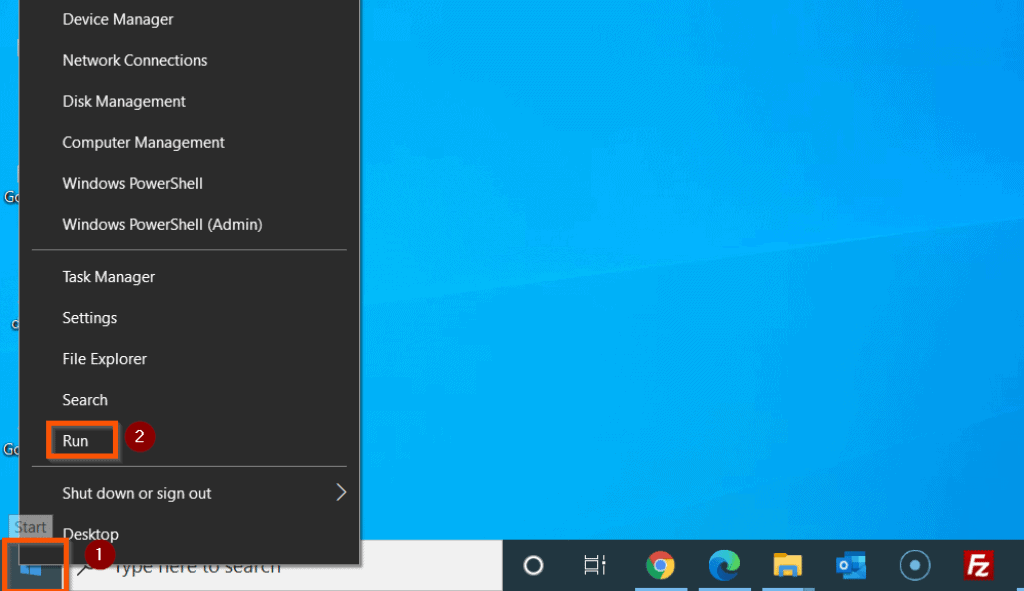
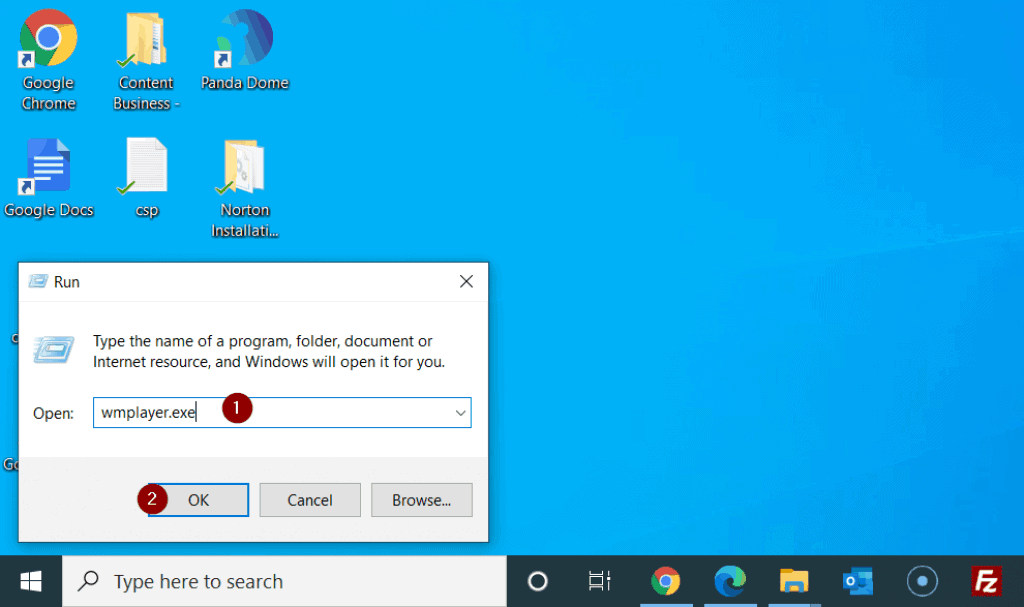
You can also open Windows Media Player via the Run command. Here are the steps:
Set Up Windows Media Player For First Time Use
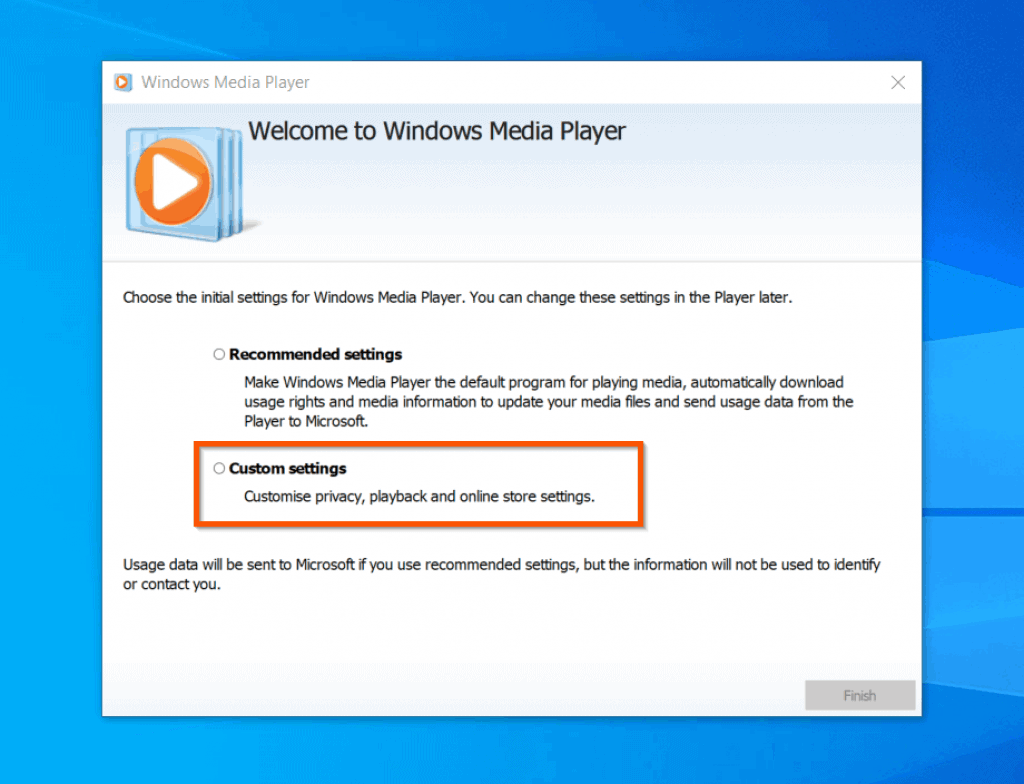
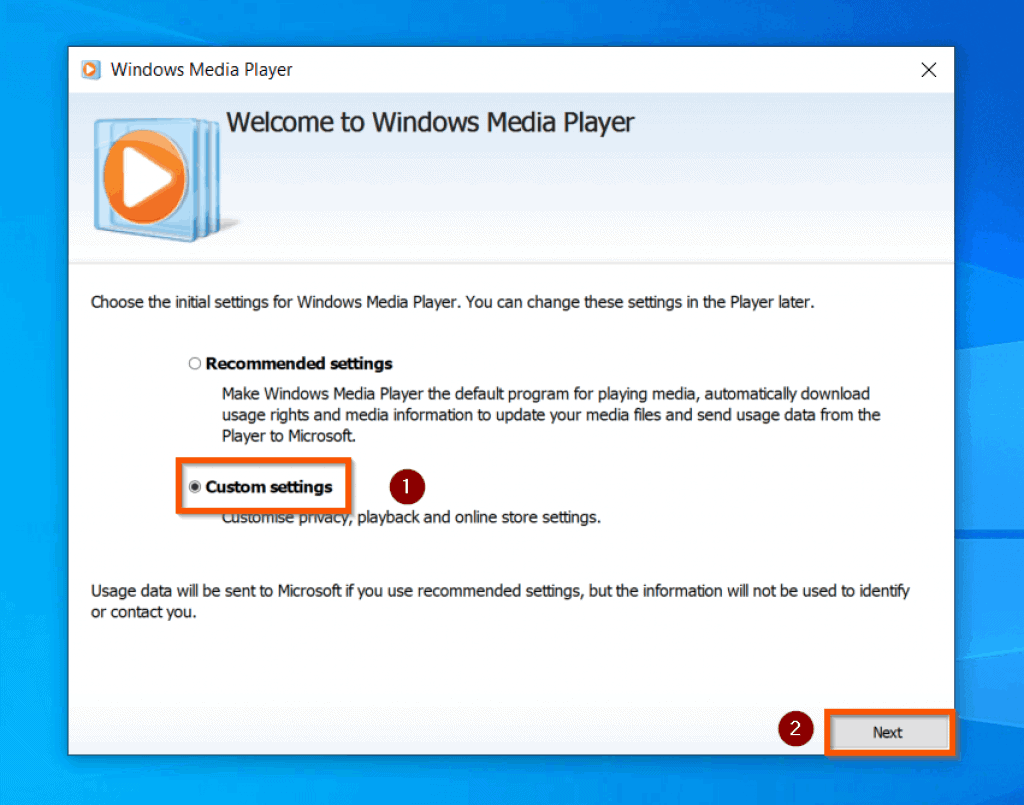
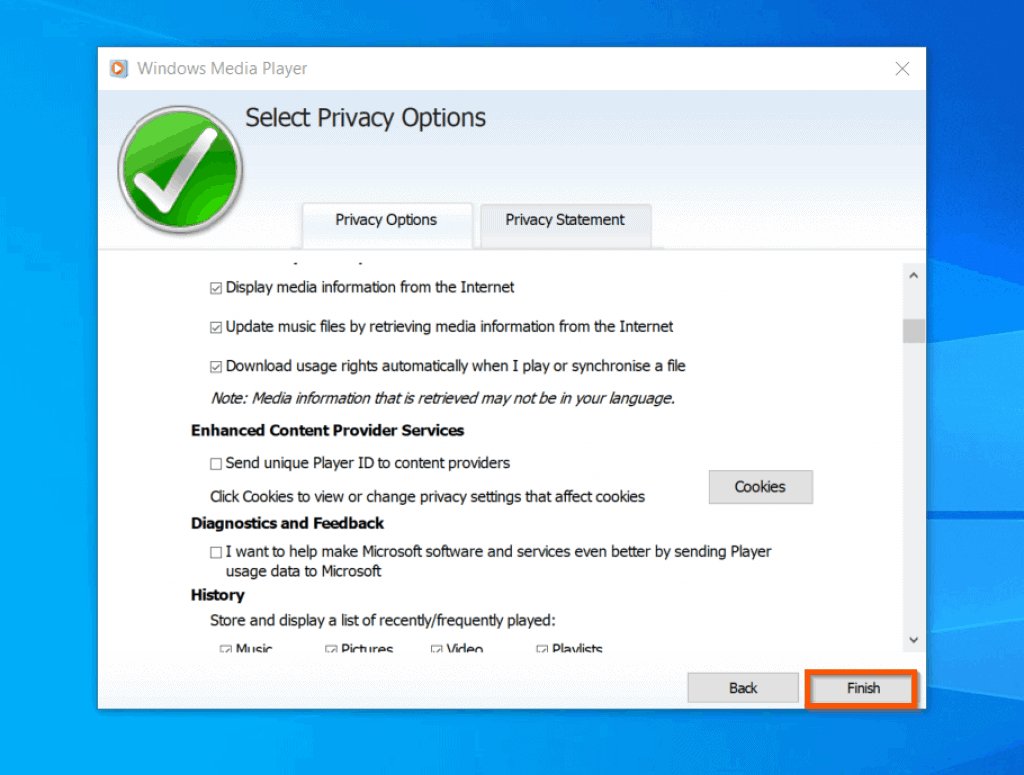
When you open Windows Media Player for the first time, it displays Welcome to Media Player with 2 setup options – Recommended settings and Custom settings. Select Custom settings and click Next. Then, on the final screen, click Finish.
How To Reinstall Windows Media Player In Windows 10
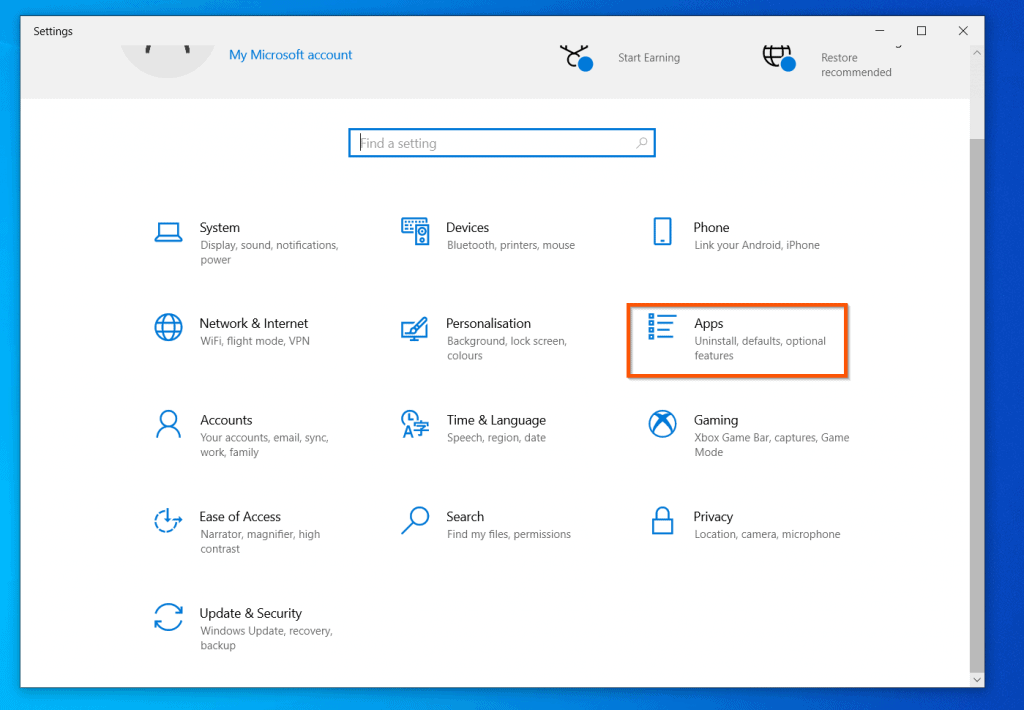
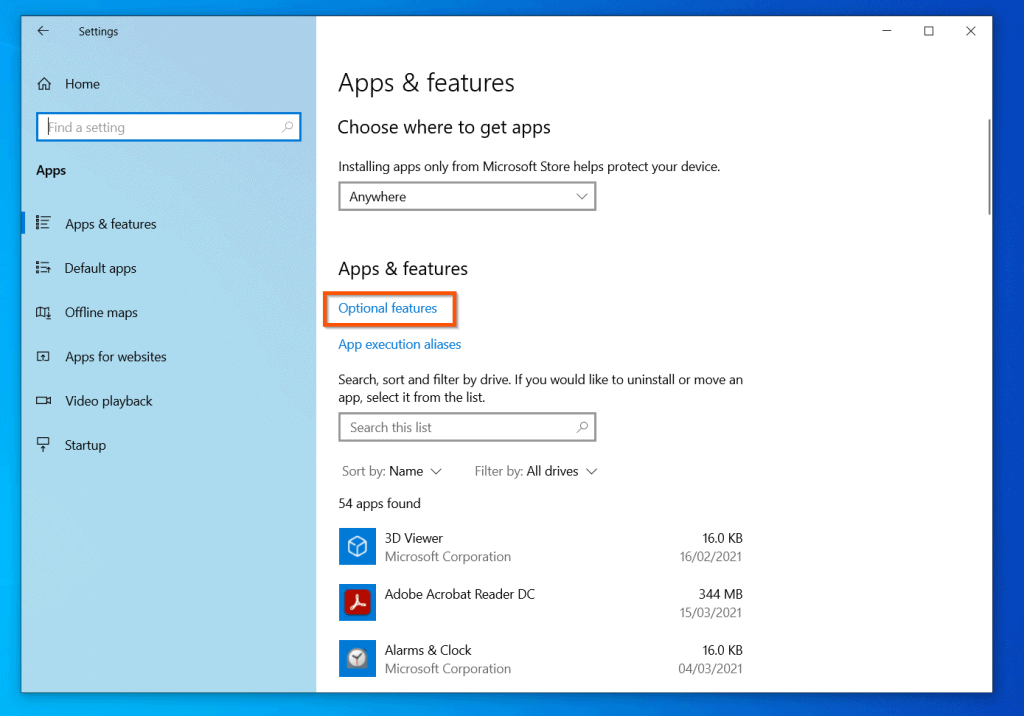
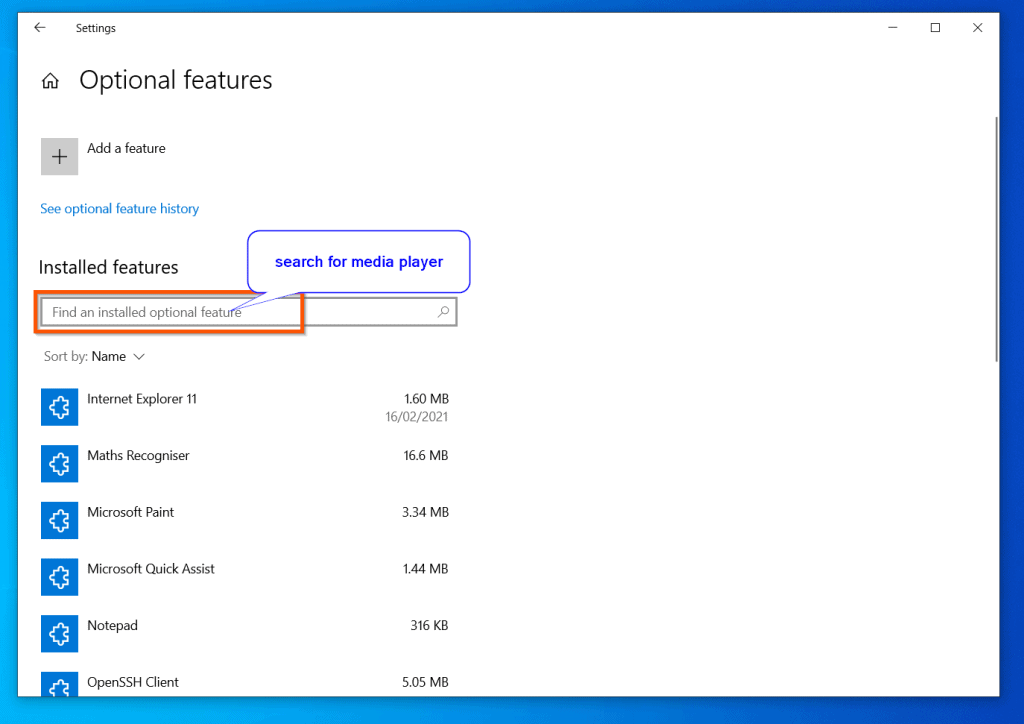
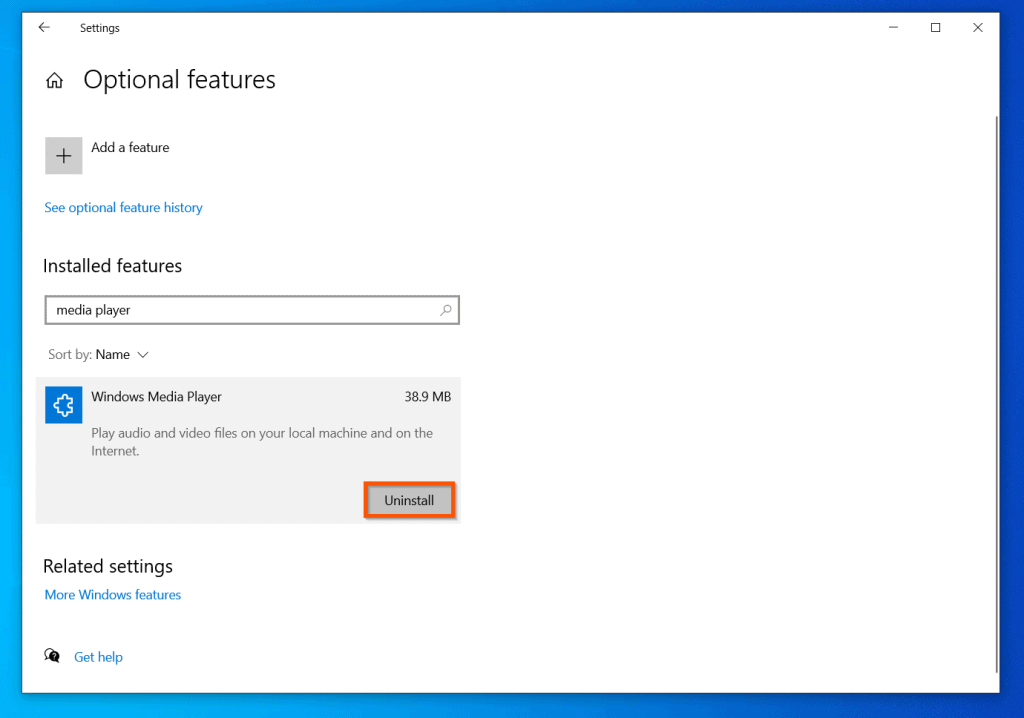
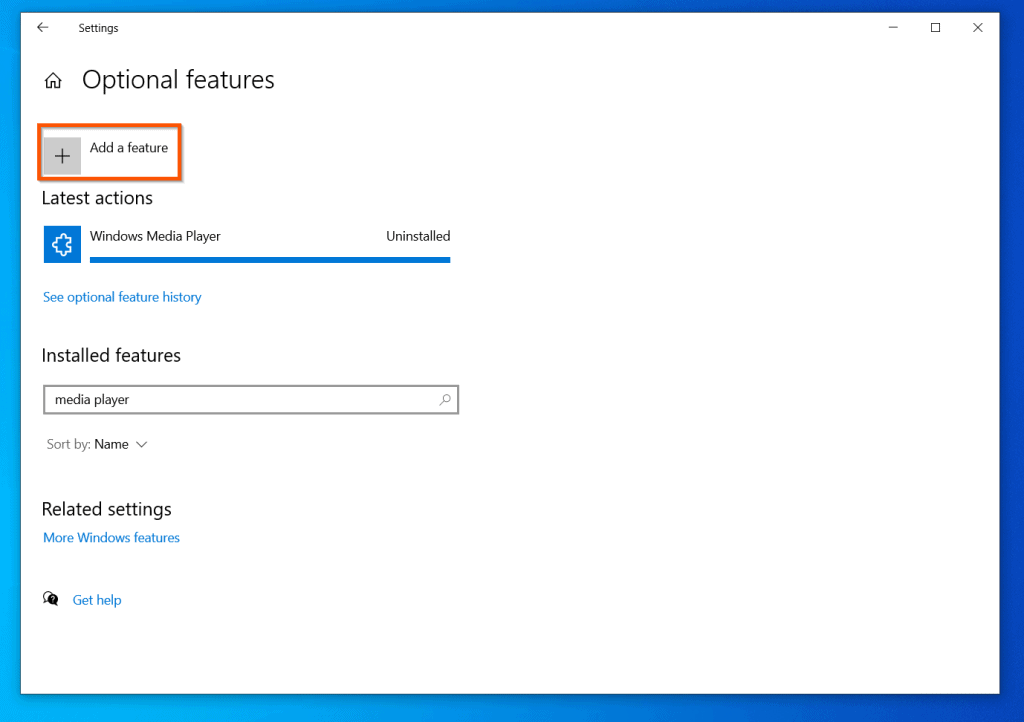
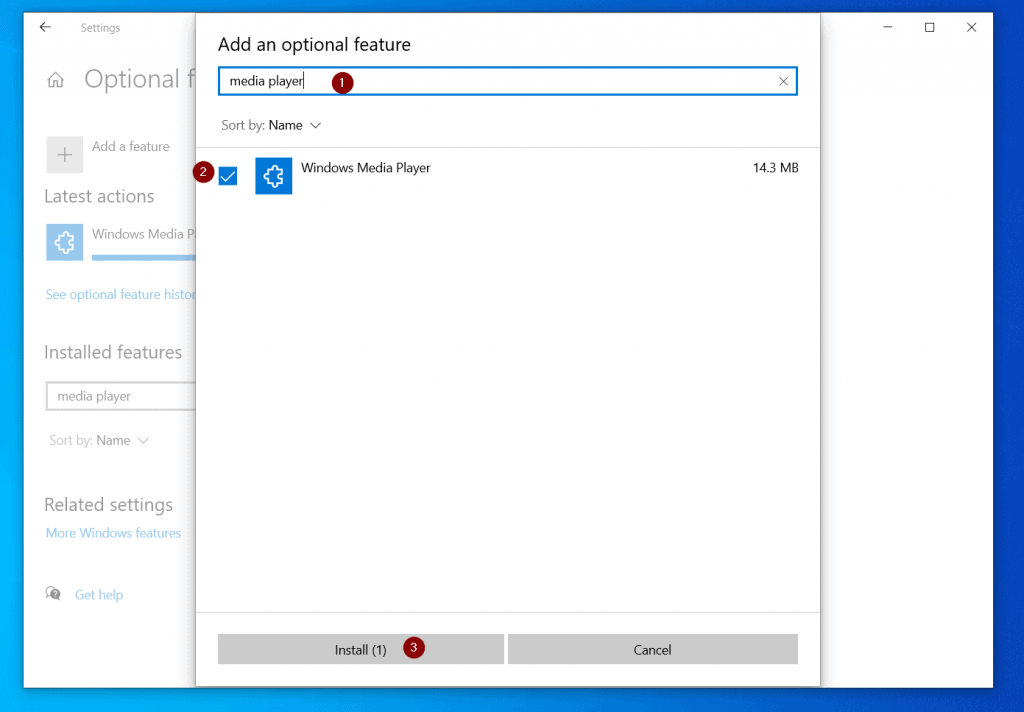
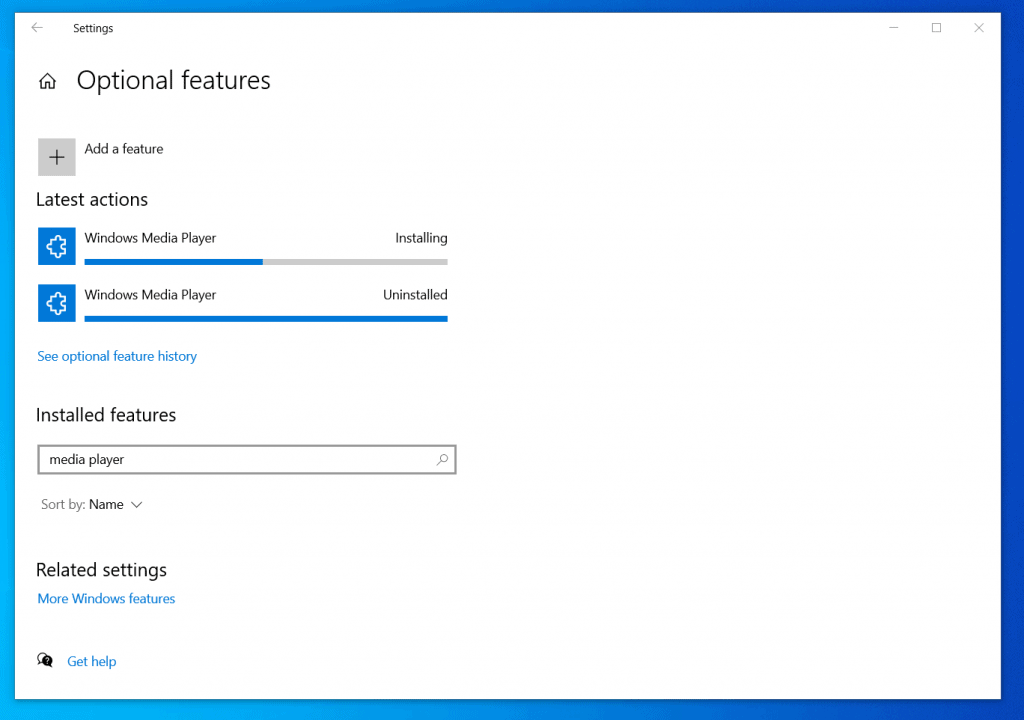
When I started writing this Windows 10 Media Player help guide, I tried opening Windows media player but couldn’t find the app. Moreover, none of the methods of opening Windows Media Player discussed in the last section worked. If you tried opening Windows Media Player but can’t find the app, follow the steps below to reinstall the app. Wait for the installation to complete, then go back to section 1 above and try opening Windows Media Player with one of the methods. One quick method to open the app is to search for it – see the second screenshot below.
Get Help With Windows Media Player In Windows 10: How To Enable Media Player Menu
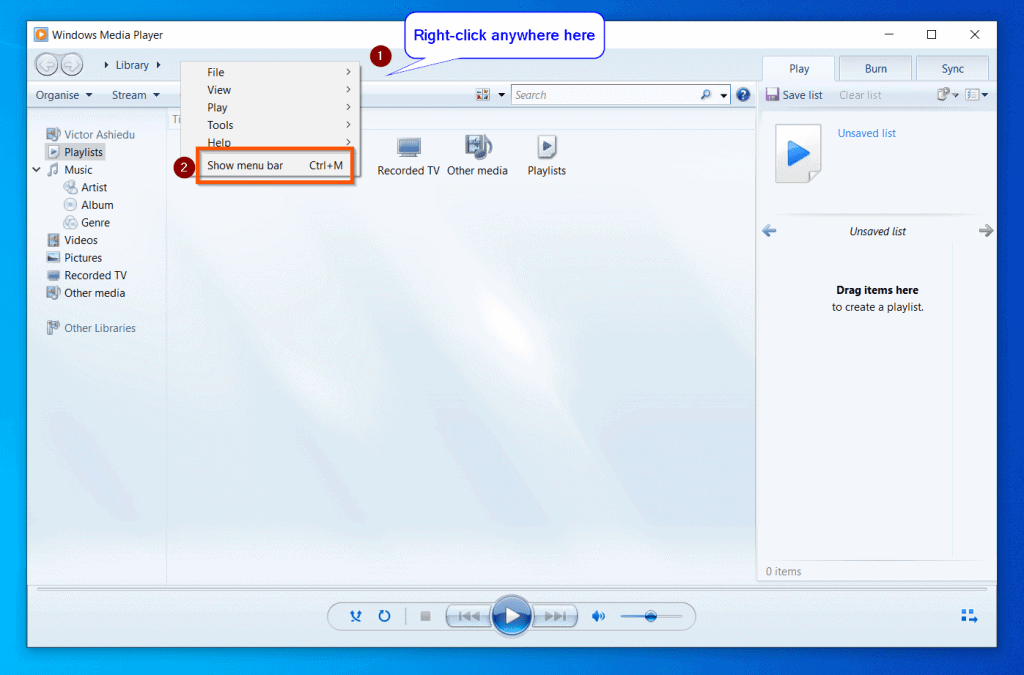
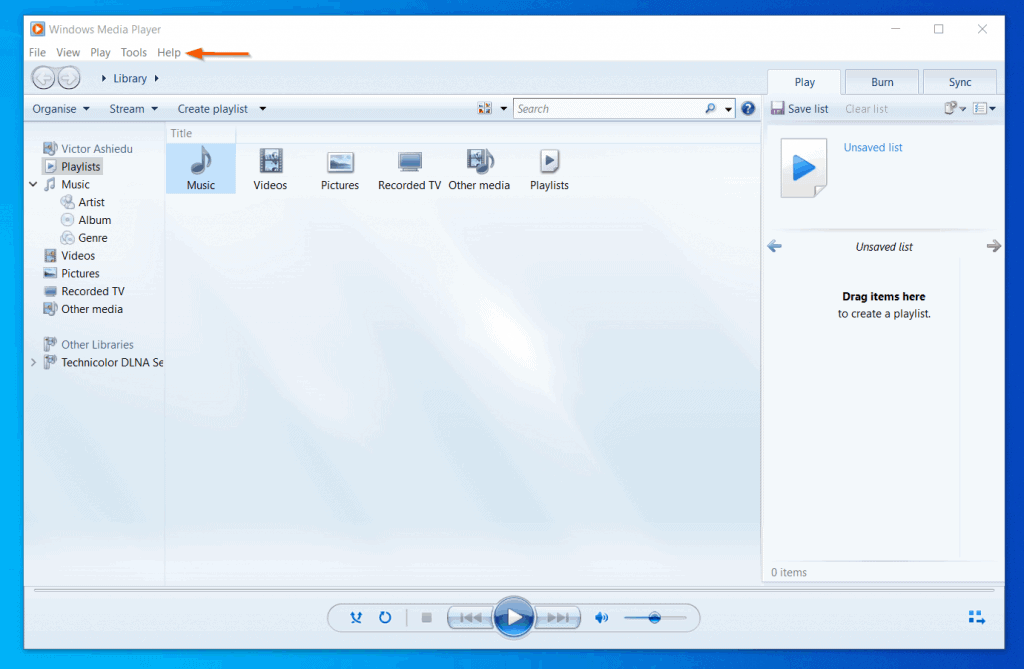
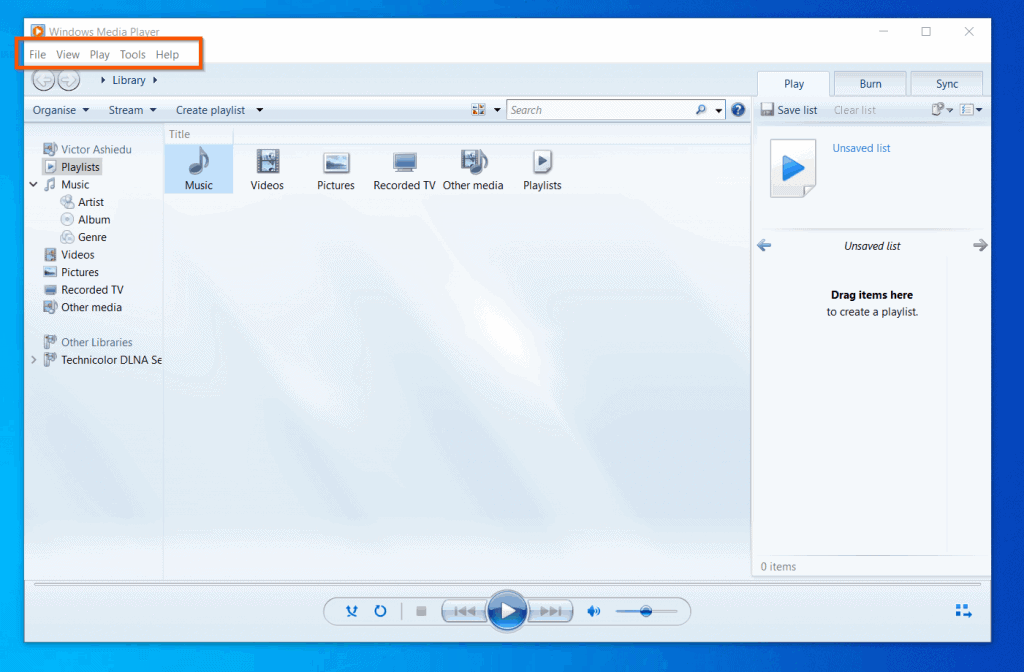
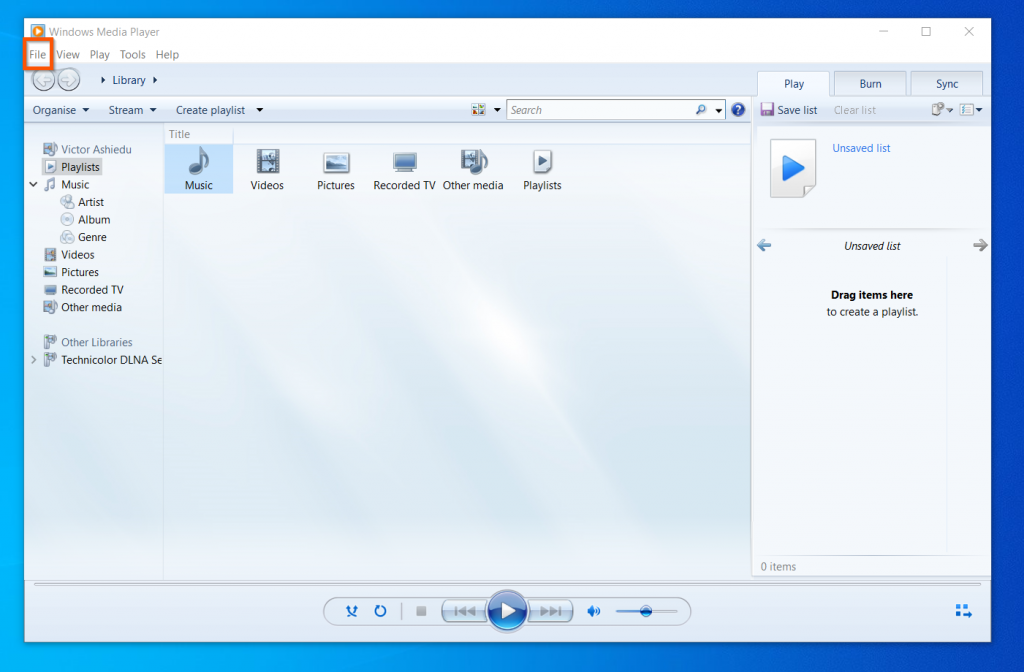
Once you open Windows Media Player in Windows 10, you may discover that the menu is missing. See the screenshot below – the point my arrow is pointing suppose to display the menu. If Windows Media Player menu is missing – well, maybe not “missing” – more like, “not displayed”, right-click anywhere on top of the app. Then, from the displayed options, click Show menu bar. Alternatively, you can use the keyboard shortcut – pressing the Ctrl and M keys on your keyboard simultaneously. The Windows Media Player menu – File, View, Play, Tools, and Help – will be displayed.
Get Help With Windows Media Player In Windows 10: Working With Windows Media Player Menu
Need help with Windows 10 Windows Media Player menu? This section walks you through how to use the five menu options – File, View, Play, Tools, and Help. This section is divided into five subsections – covering each of the Windows Media Player menu.
Windows 10 Windows Media Player “File” Menu
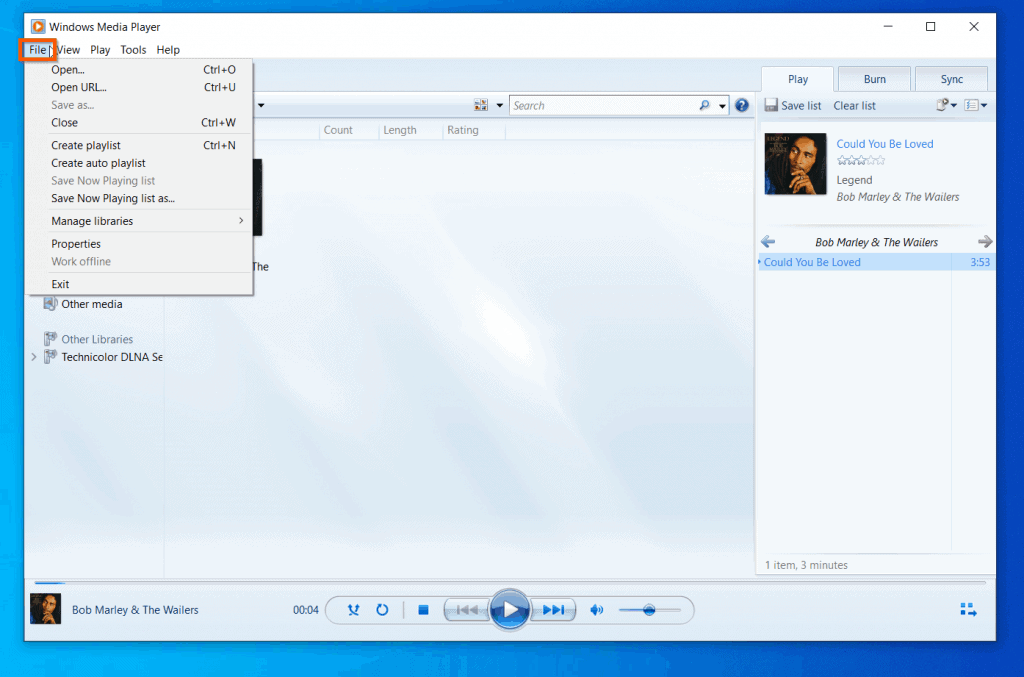
The File menu has additional options. Each item is discussed beneath this screenshot.
Open and Open URl
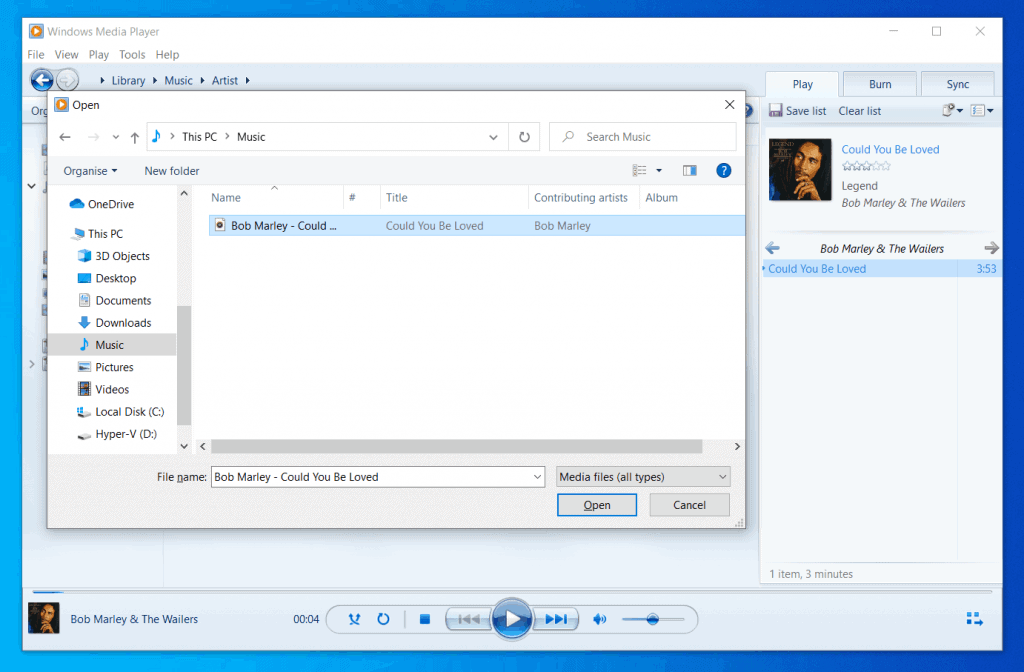
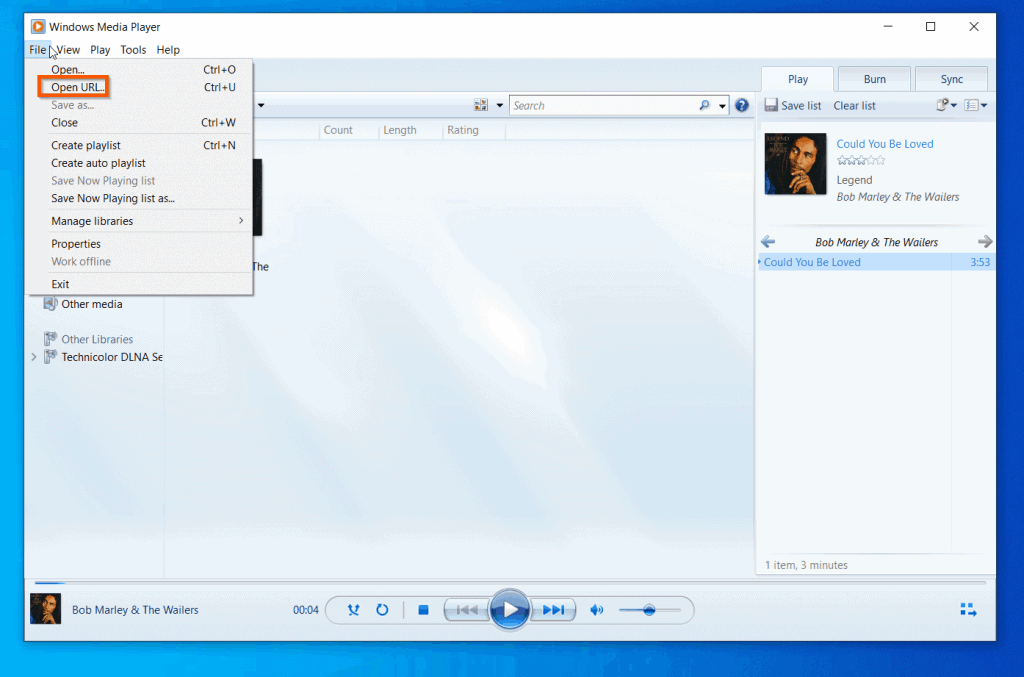
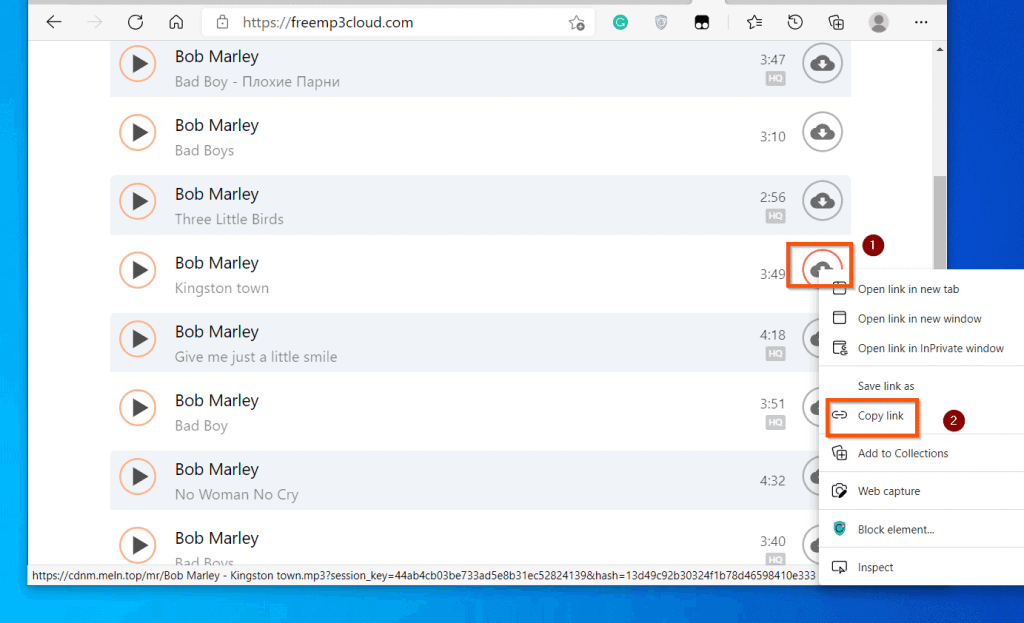
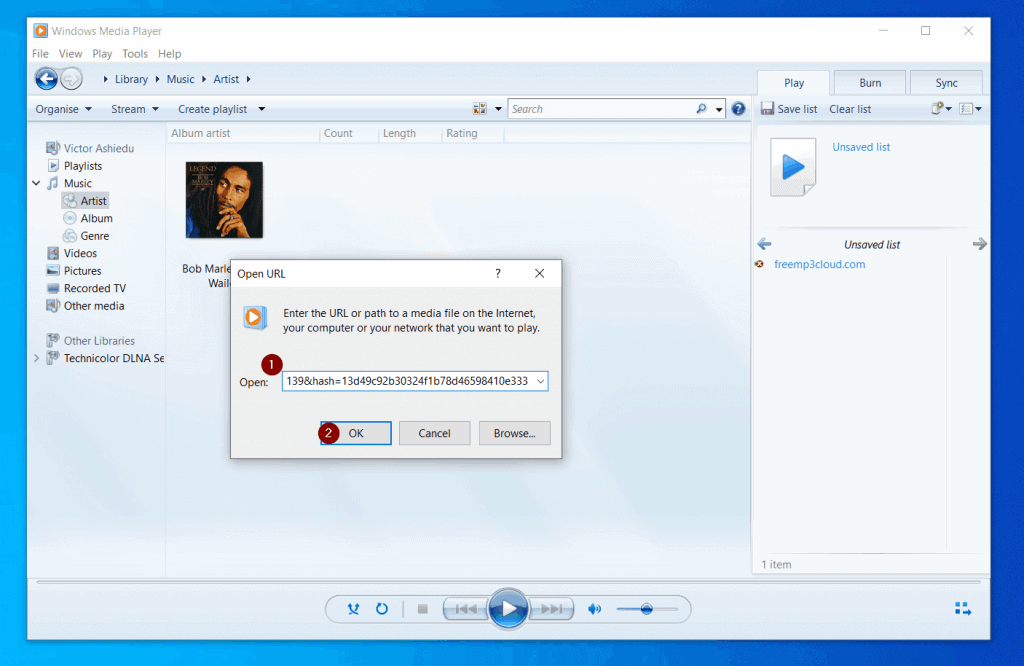
You can use the Open sub-menu to open a music or video file from your computer. When you click Open, it will display a dialogue box. Navigate to the folder with music or video file, click on a file and click Open at the bottom right of the dialogue box. On the other hand, the Open URl sub-menu is used to open a music or video file from a web URL. Follow the steps beneath this screenshot to open a music or video file from a URL.
Save As and Close
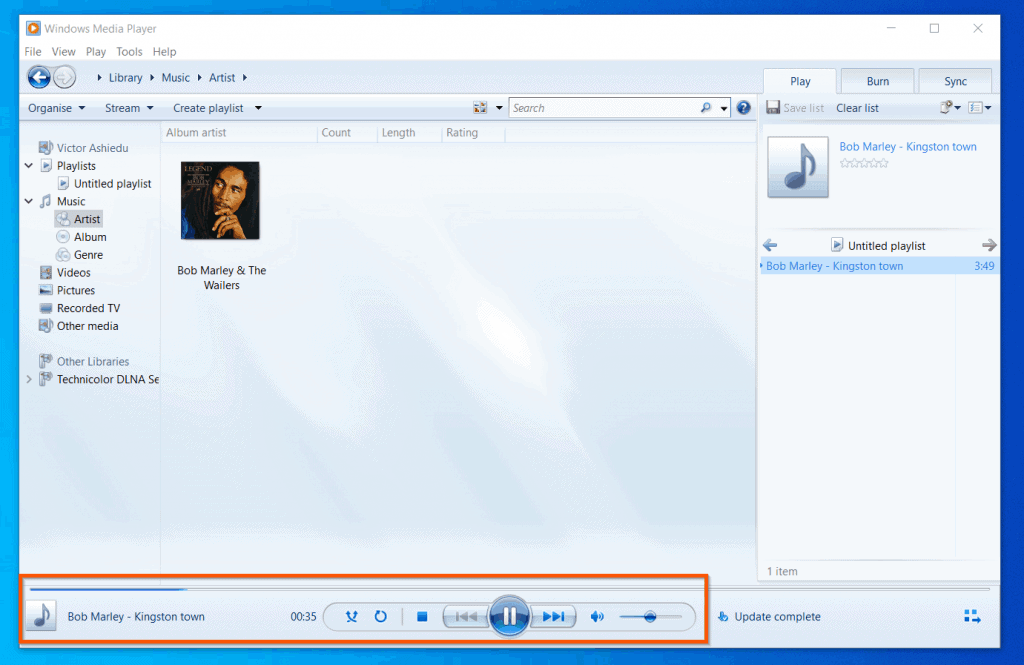
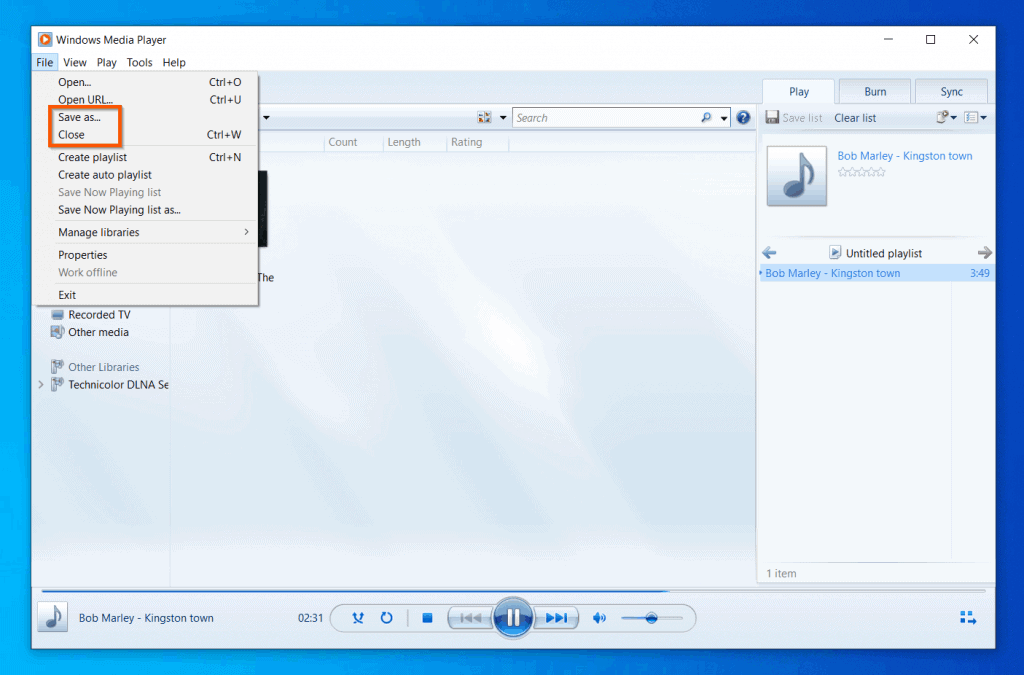
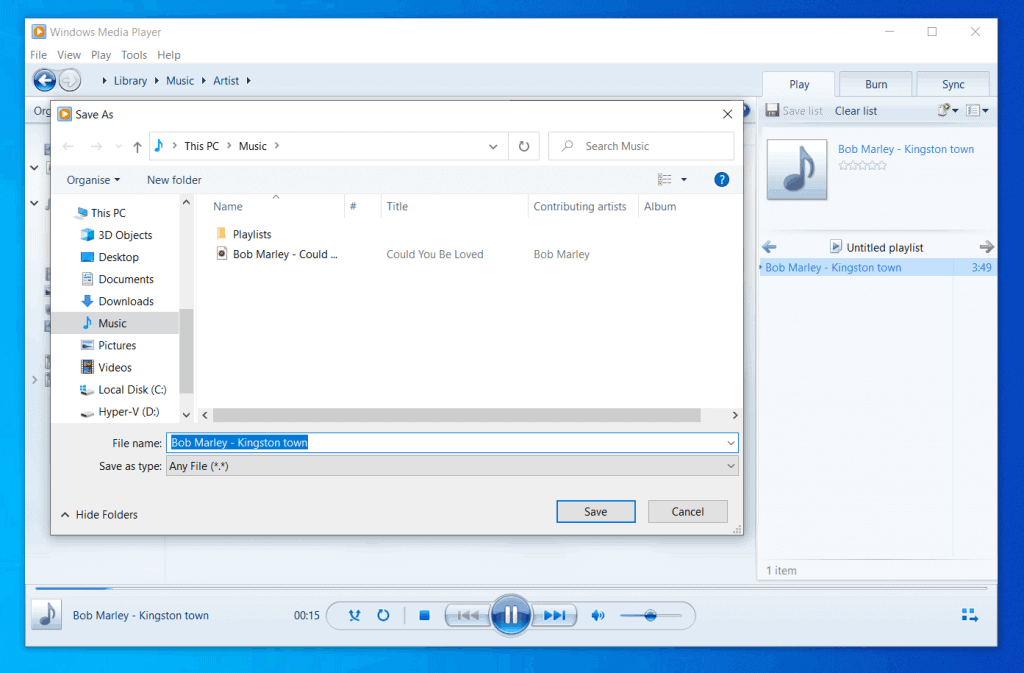
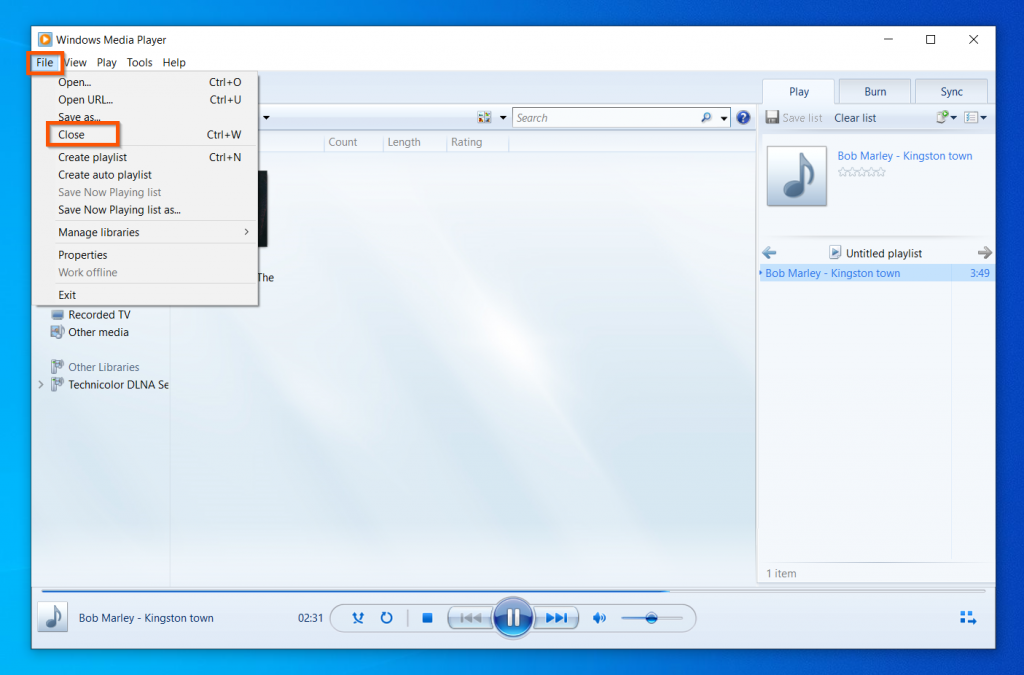
Next to Open and Open URL in the File menu, are Save as and Close. The Save as sub-menu will only be active if you are playing a music or video from an online link. To save the media you are streaming via an internet link to your computer:
- Click File -> Save as. While you can save streaming music or video with the File -> Save as sub-menu, the Close sub-menu is used to stop what you are playing. To stop stop a playing music or video, click the Close button.
There are more exciting Windows 10 Media Player help with how to use the File menu. To find out more, read on.
Create Playlist and Create Auto Playlist
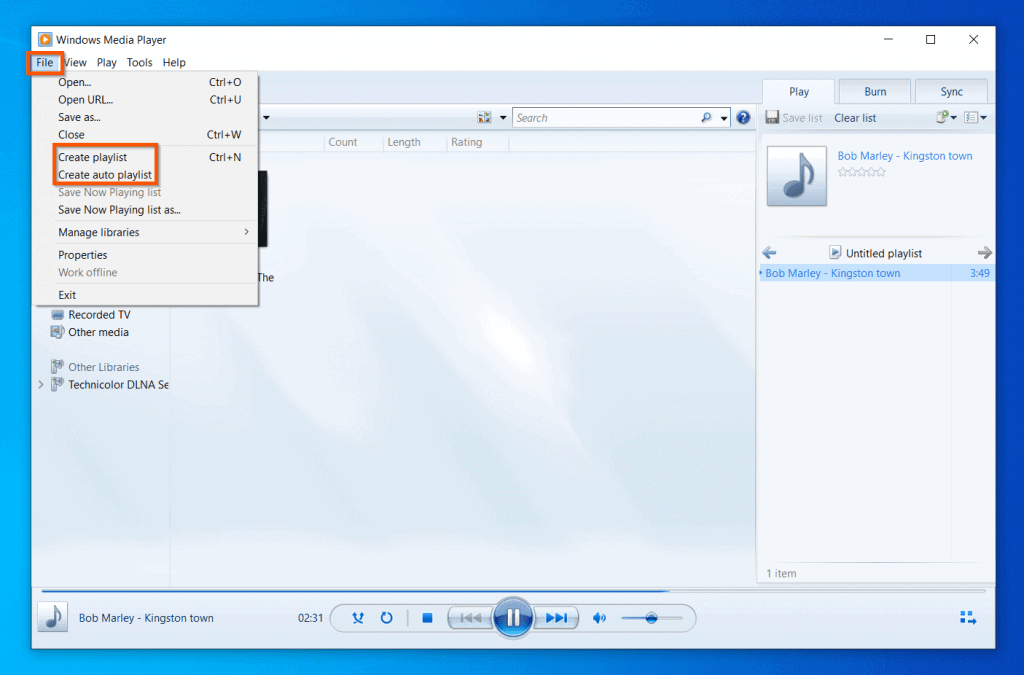
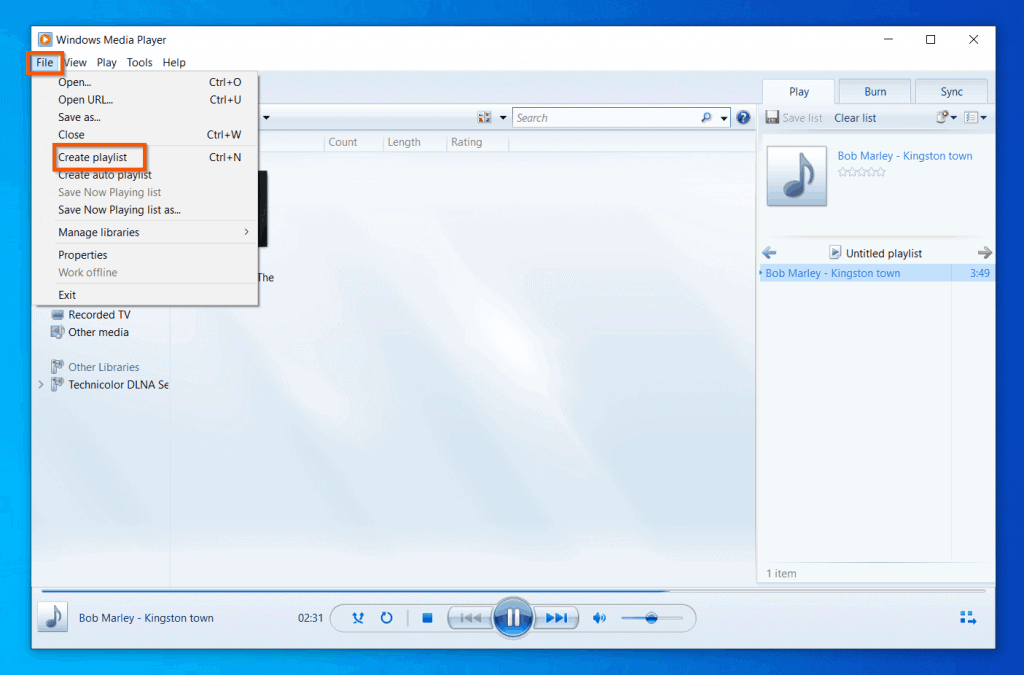
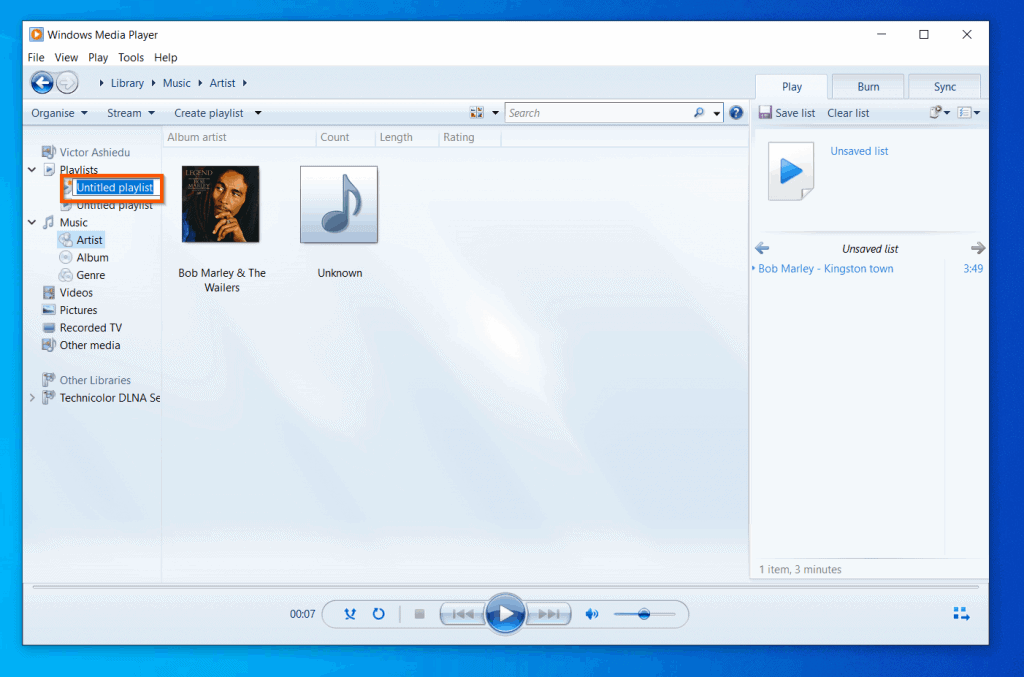
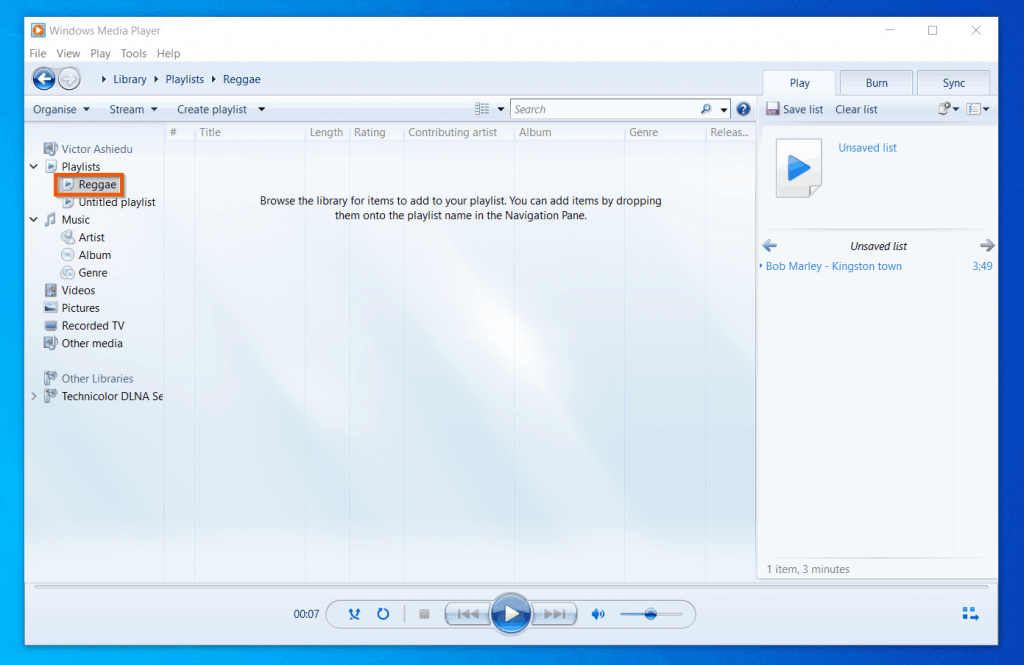
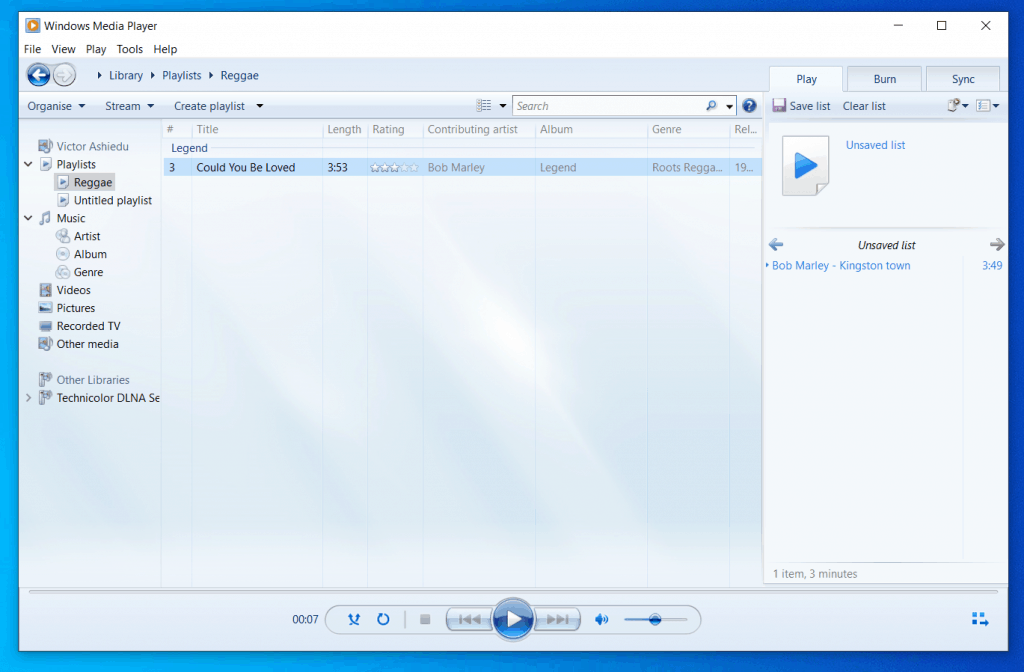
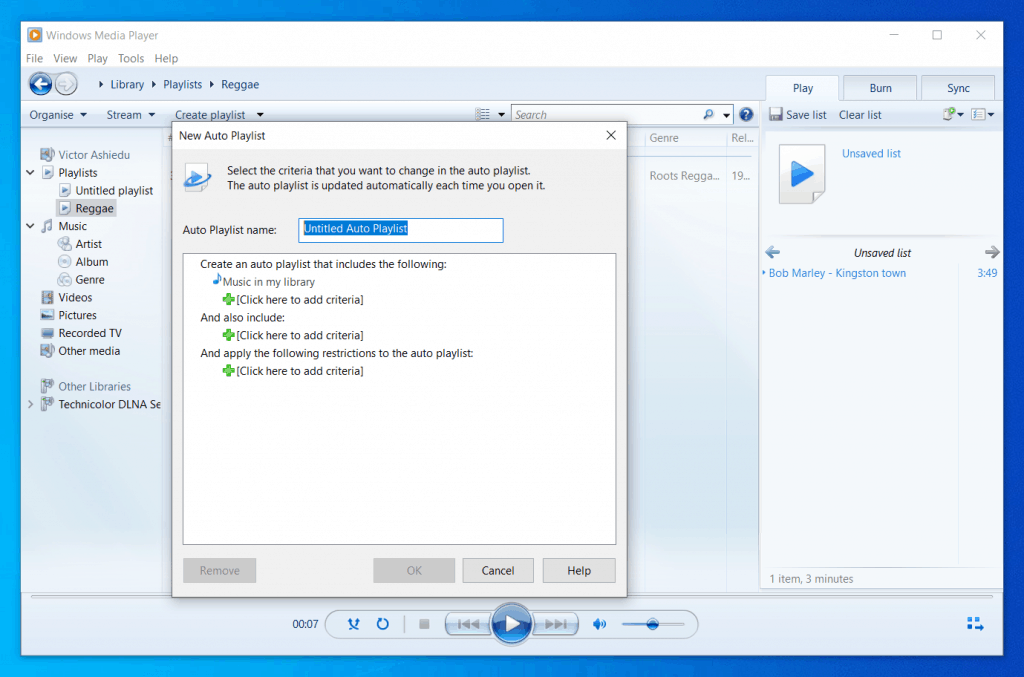
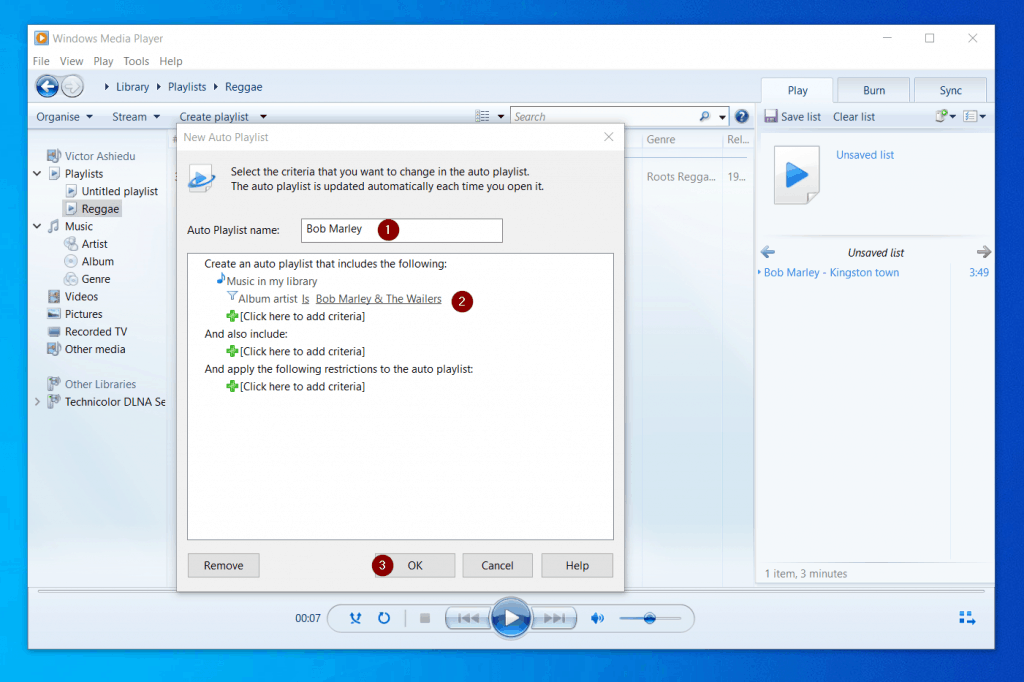
The use of the “Create playlist” button is straightforward – you use it to create playlist. Additionally, it is easy to use – more on how to use it later in this section. . The use of the “Create auto playlist” button, however, may not be that straightforward. I will show you how to use this button shortly. But first, let me show you how to create playlists. As I noted earlier, you can also create auto playlists. Unlike a playlist that you have to add titles to manually, an auto playlist automatically adds titles based on specified conditions. To create auto playlists:
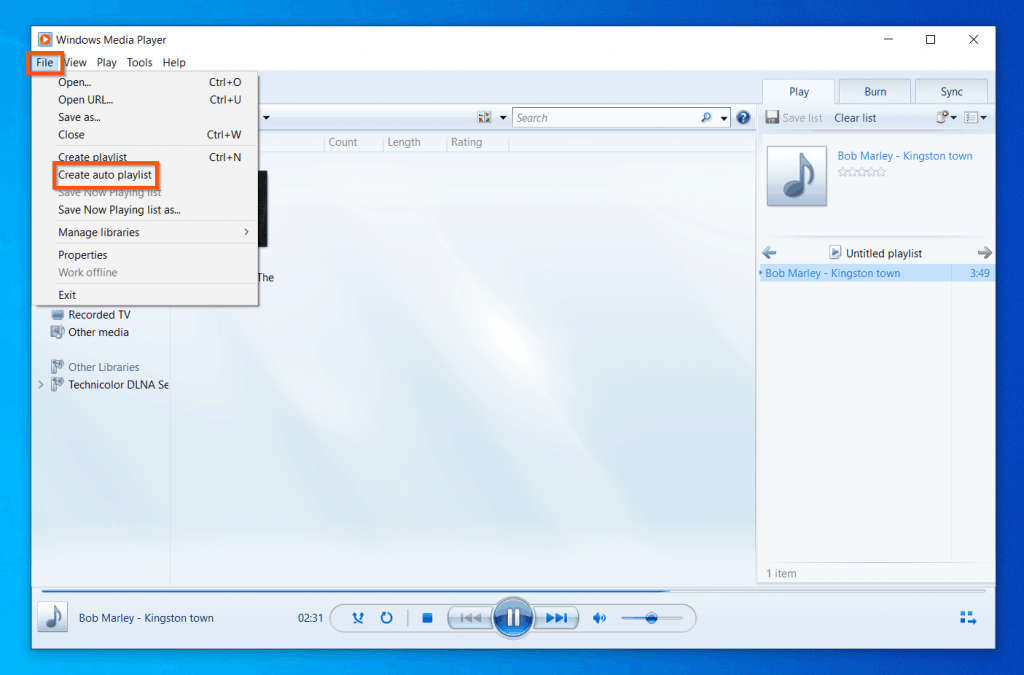
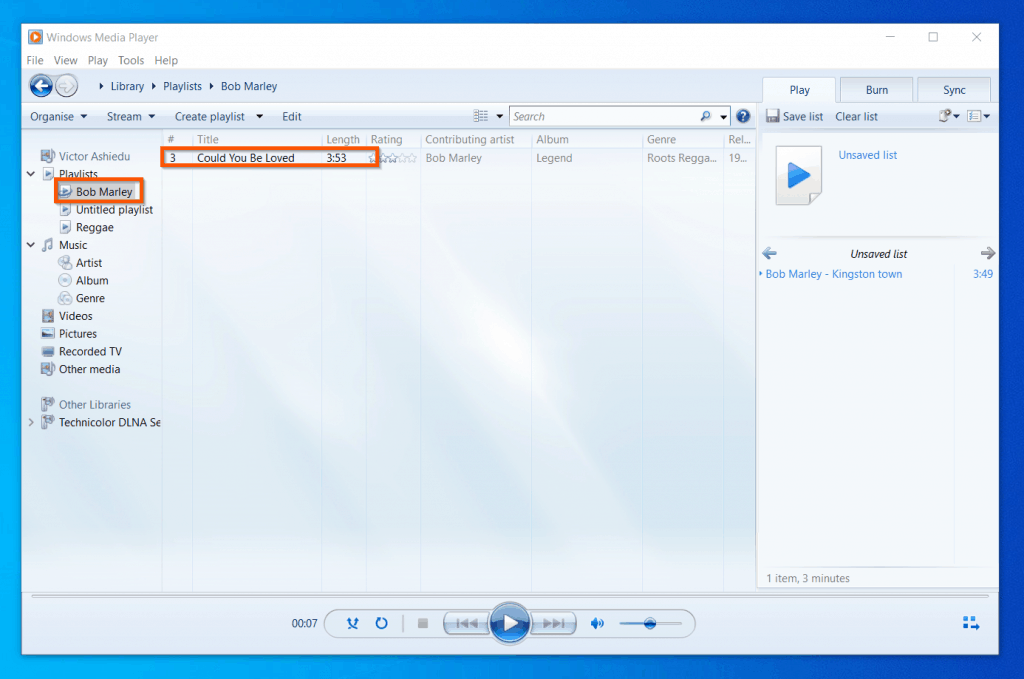
- Click File and select Create auto playlist. Refer to the screenshot below. The new auto playlist I just created has the only Bob Marley title I have in my Windows 10 Windows Media Player automatically added to the playlist. After creating an auto playlist, any new title added into your Windows Media Player – that meets the auto playlist criteria – will be added to the playlist.
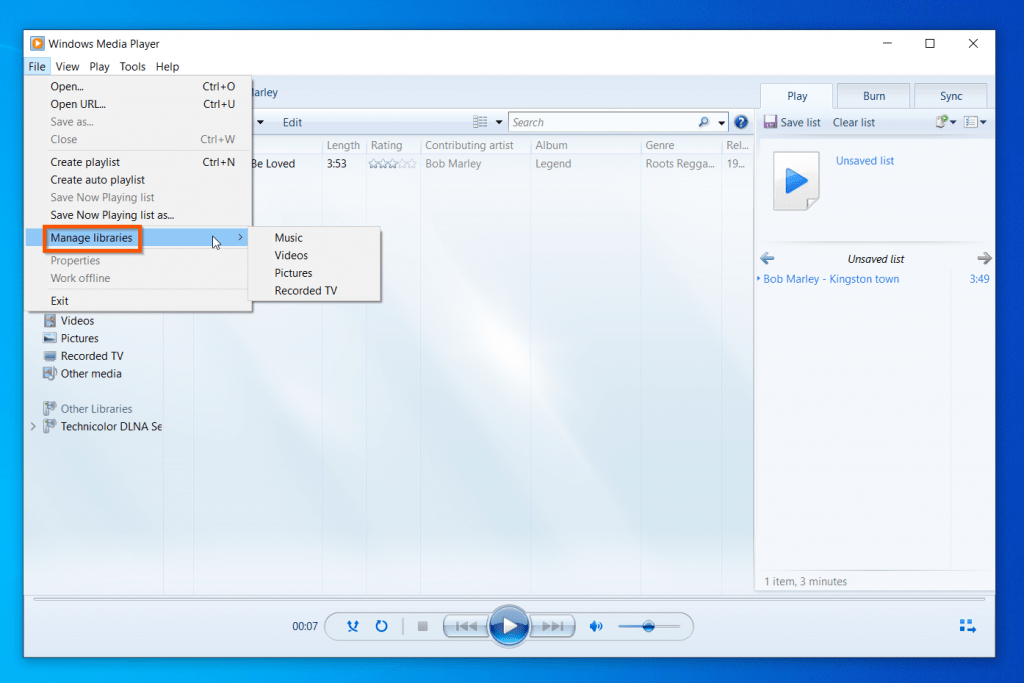
Manage Libraries
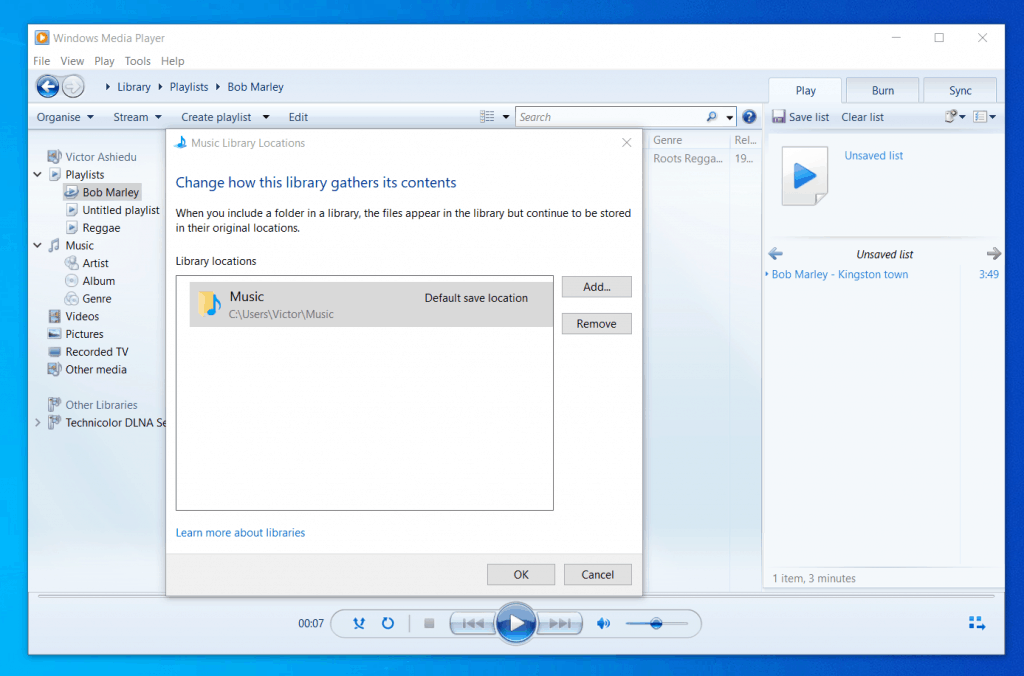
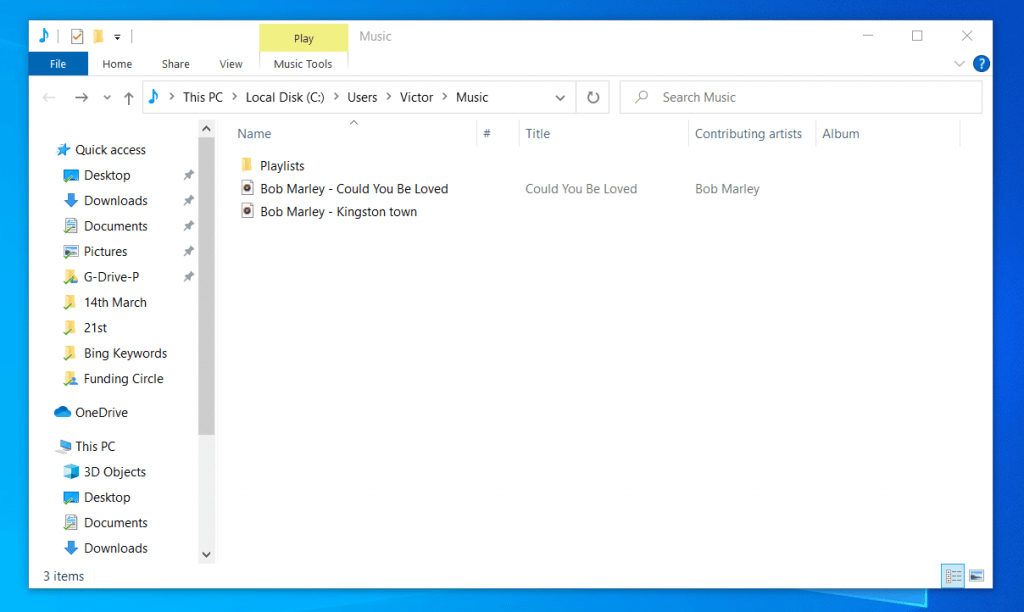
The final sub-menu of the File menu I will discuss is Manage Libraries. When you hover over the Manage Libraries sub-menu, it displays options to manage Music, Video, Pictures, and Recorded TV libraries. When you click any of these libraries, you can add or remove folders that Windows Media Player can pick up files from. For instance, you can add or remove new folders. Here is my Manage Music Library window. The default location that Windows Media Player saves music files is %userprofile%\Music folder. This folder opens to the drive your music folder is located – in the path \Users<your user name. To remove this folder click on it, then, click Remove. Additionally, you can add a new folder by clicking the Add button. The first screenshot below shows my default Music library folder, %userprofile%\Music. Note that I have two music files here. Now, look at my Windows Media Player Music library in the second screenshot below – it shows the same music in the folder. One more thing to note, the %userprofile%\Music folder has a folder called Playlists. This folder saves all the Music Playlists you create in Windows Media Player.
Windows 10 Windows Media Player “View” Menu
As a reminder, this section is still about “Working With Windows Media Player Menu”. In the last sub-section I disused the File menu. In this sub-section, I will be discussing the View menu. The View menu may not be as complicated as the File menu. However, it offers equally important features. While the File menu is used for configuring different aspects of Windows 10 Windows Media Player, the View menu menu controls the appearance of Windows Media Player. In this section I will show you how to make your Windows Media Player more fun with the different View options. We will start with the default view – Library View.
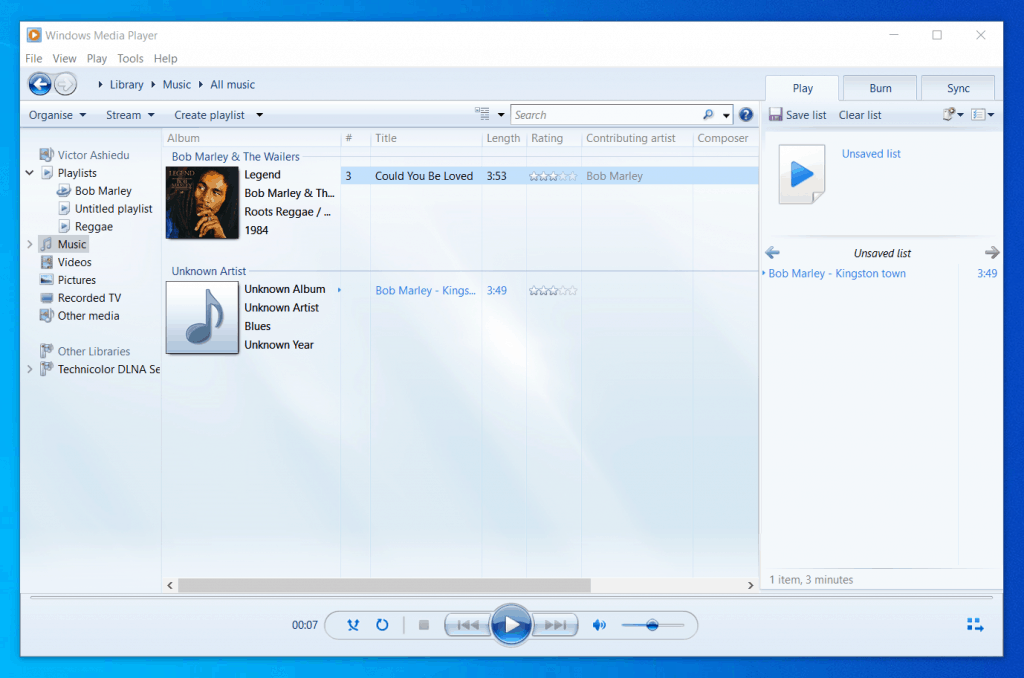
Windows Media Player “Library” View
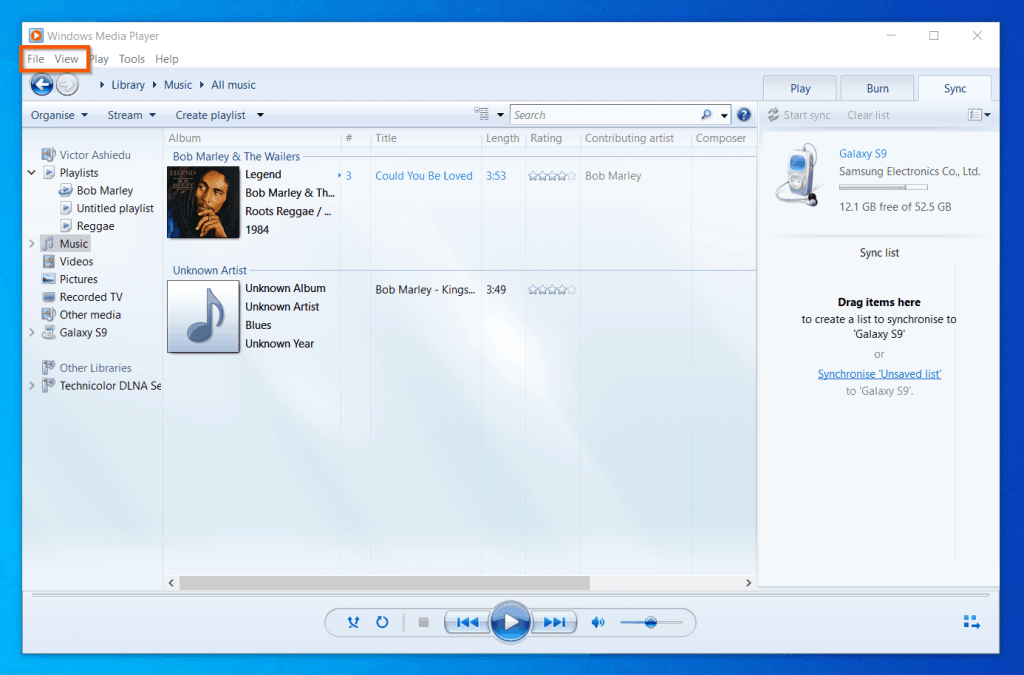
The “Library View” is the default Windows Media Player view. The first column (left pane) of this view displays Playlists, Libraries (Music, Video, Picture, and Recorded TV). In the middle pane, you have the media titles with all the details about the title. Finally, on the right pane, you have three tabs – Play, Burn, and Sync. The Play tab of the last pane displays a list of the recent titles you have played. Additionally, if there is a CD/DVD burner connected to your computer, it will be displayed in the Burn tab – you can drag and drop titles you want to burn to CD/DVDs via this tab. Finally, and equally important is the Sync tab of the last pane of the Library View. If you connect your phone to your computer, Windows Media Library will display the device in the Sync tab.
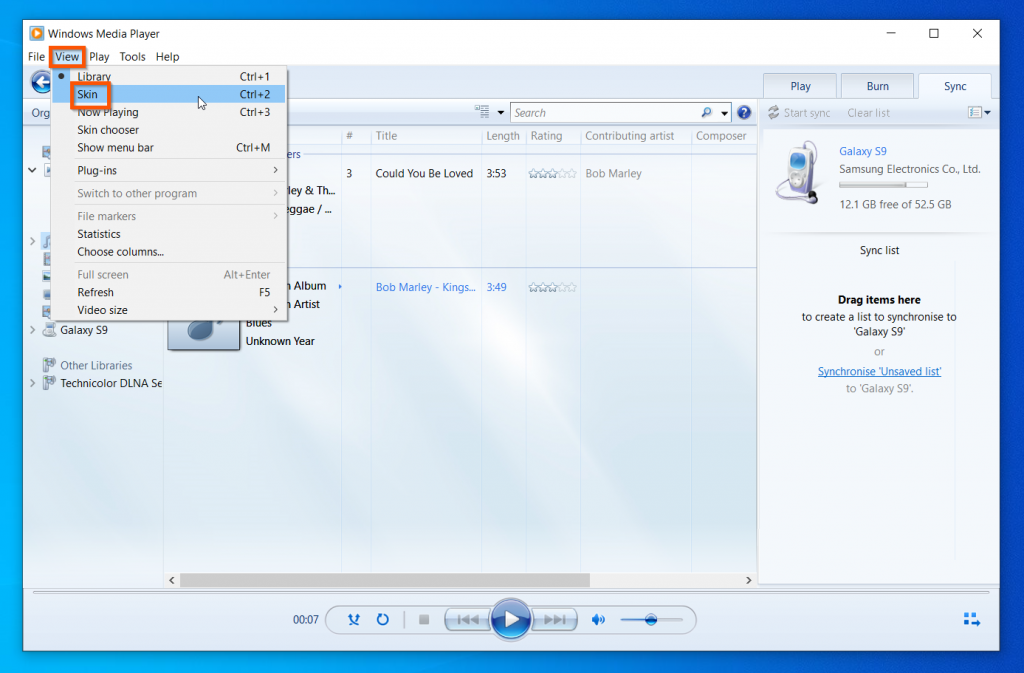
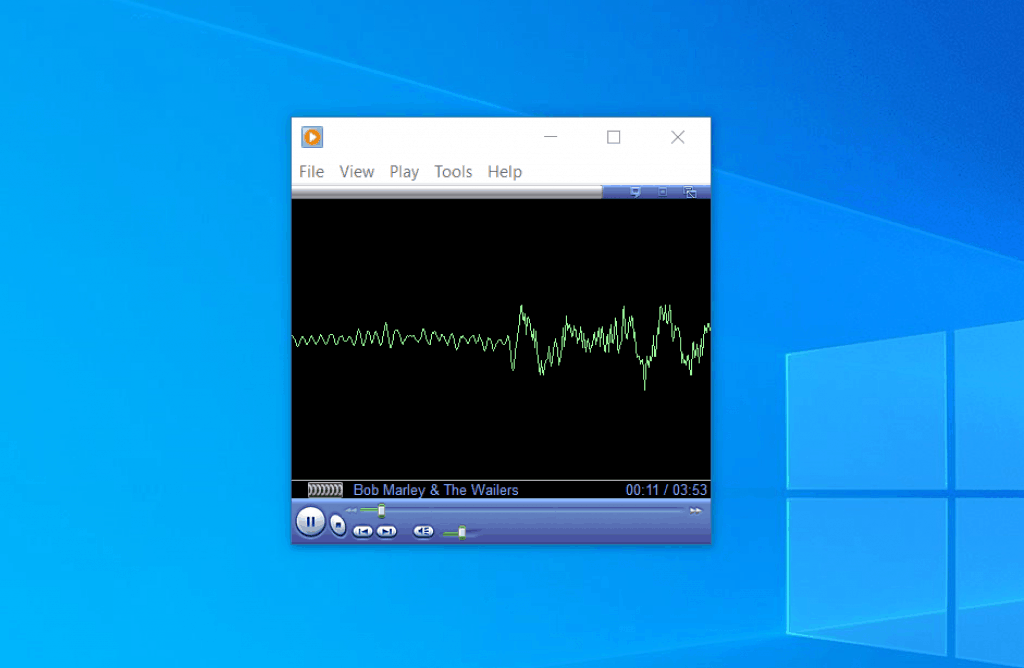
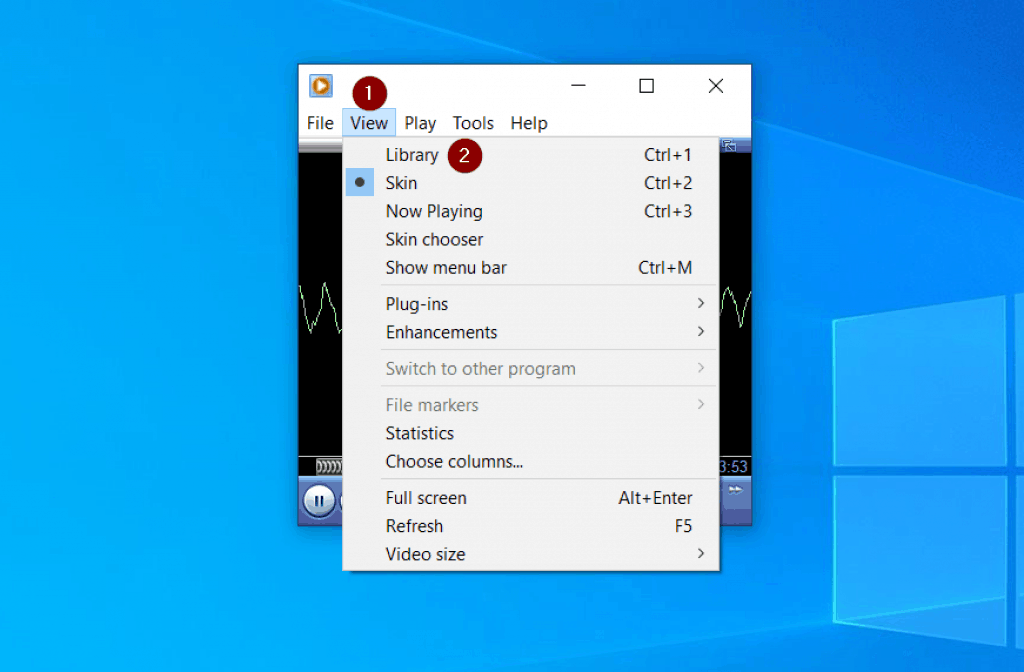
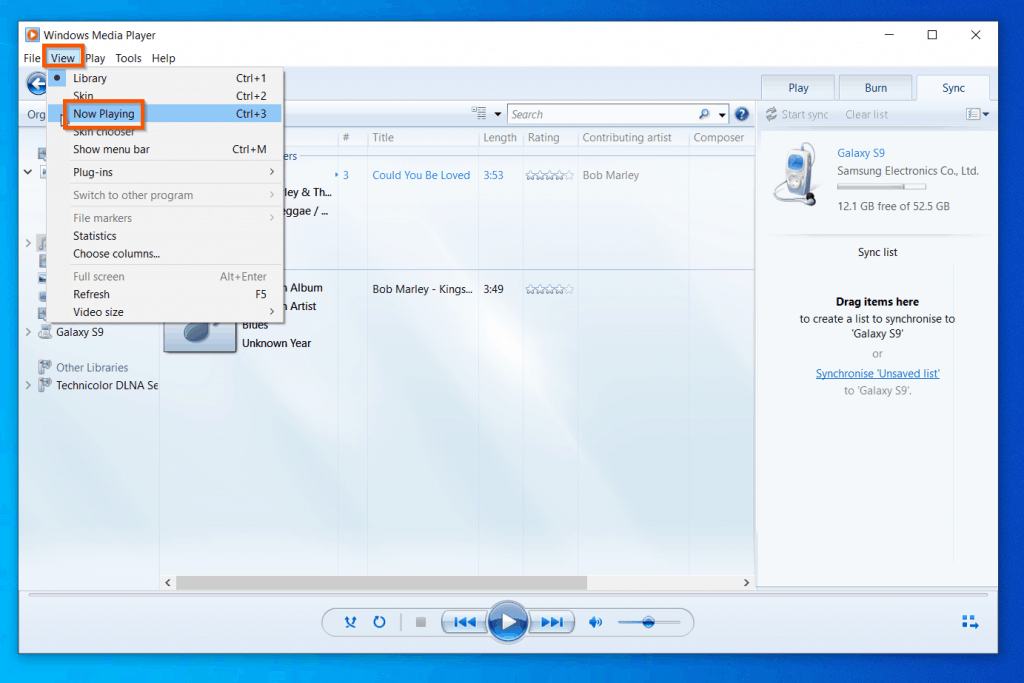
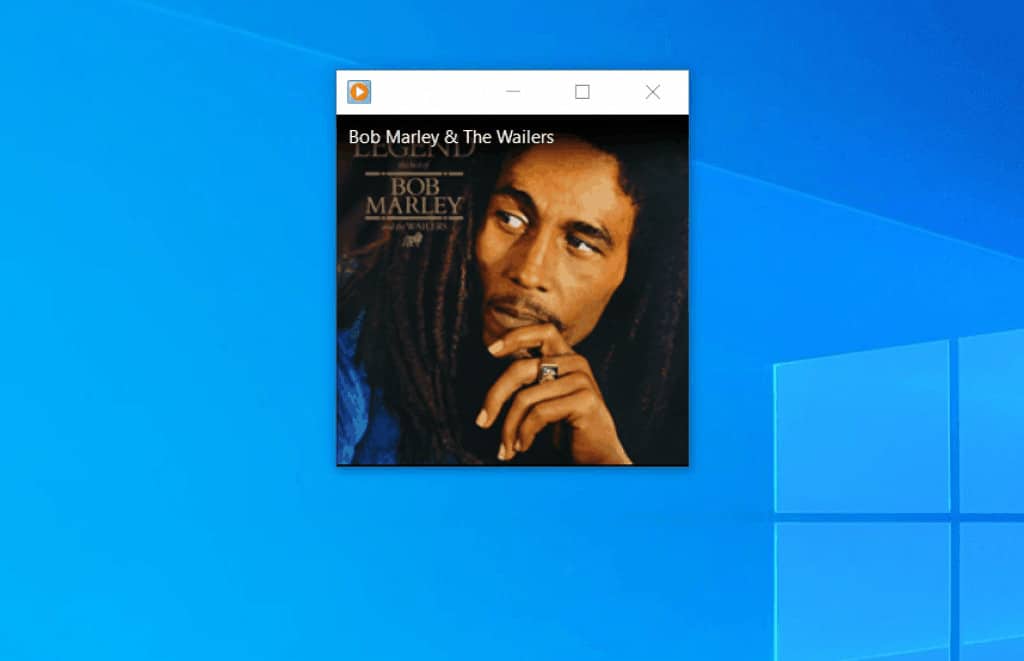
Windows Media Player “Skin” and “Now Playing” Views
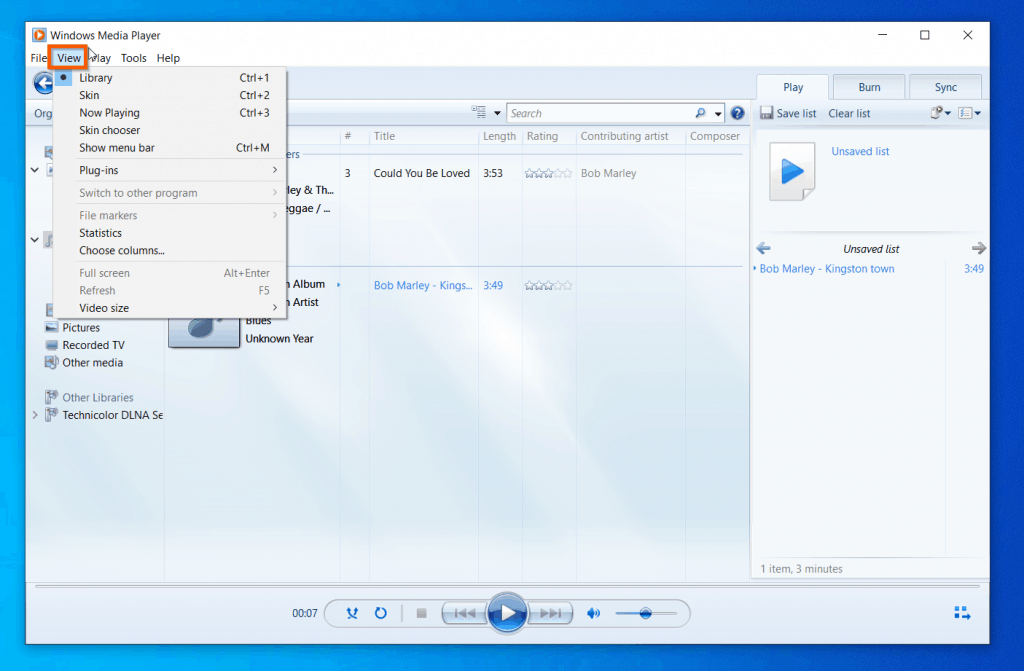
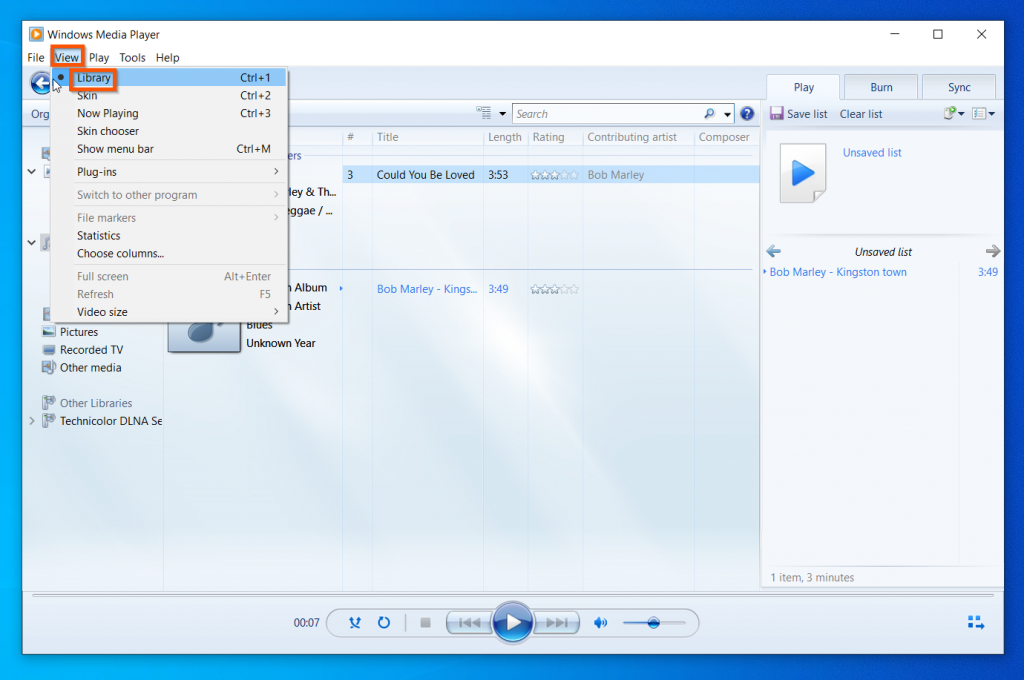
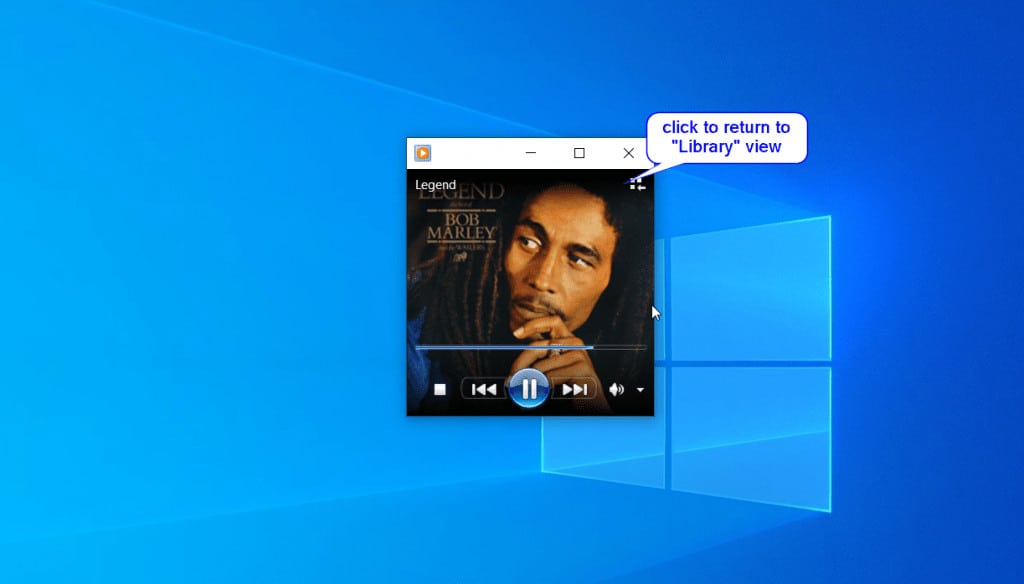
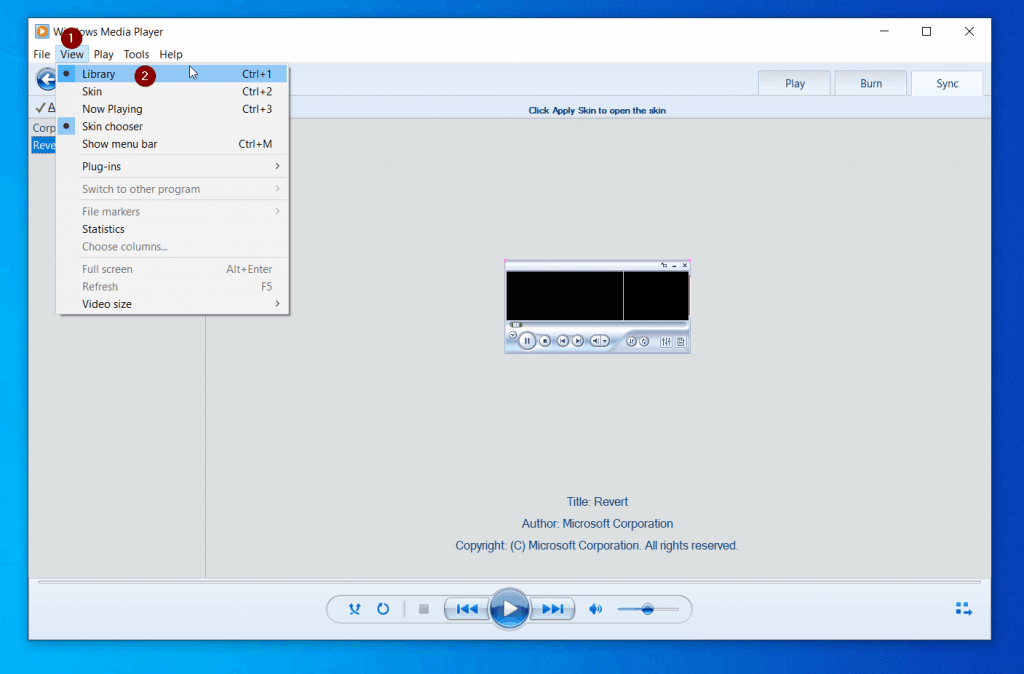
The “Skin View” display a tiny black Window (default) that displays information about the media you are playing. At the bottom of this view you can control the play – fast forward, pause, increase volume, and more. To return to the default “Library View”, click the View menu, then select Library. Alternatively, you can use the keyboard shortcut keys – pressing the Ctrl and 1 keys on your keyboard simultaneously. Moving on, similarly to the “Skin” view is the “Now Playing” view. To display your Windows 10 Windows Media Player in the “Now Playing” view, click View, then select Now Playing. The “Now Playing” view looks like the “Skin” view but instead of displaying a Windows Media Player “skin”, its displays the album information. If you hover your mouse over the “Now Playing” view, on the top right, you have an icon – clicking this icon returns Windows Media Player to the “Library” view. Then, at the bottom of the view, you can stop, rewind, fast forward, and mute the title playing.
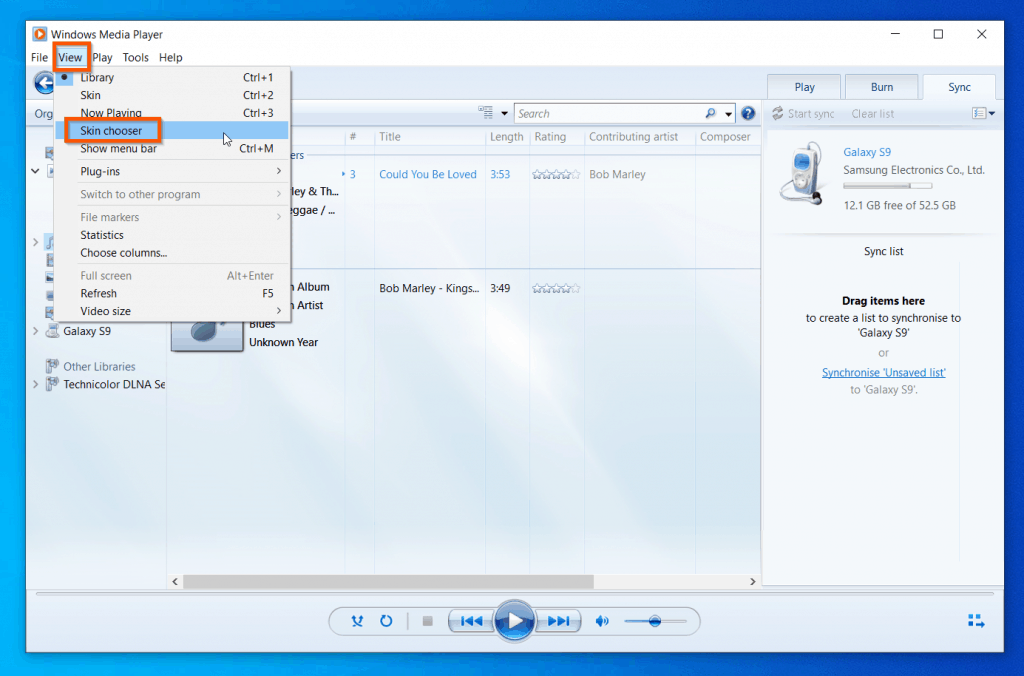
Windows Media Player “Skin Chooser”
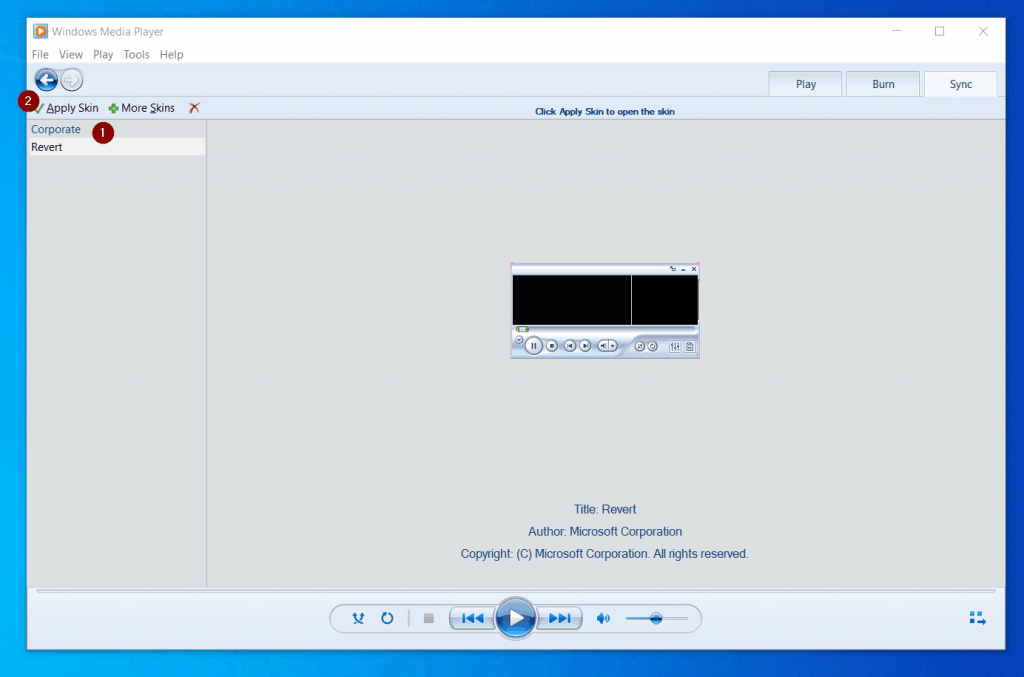
Windows Media Player skins is a hot help topic most Windows 10 users need help using. Well, here it is! To choose a different skin, click View, then select Skin Chooser. The Skin Chooser screen displays available Windows Media Player skins. To change to a new skin, on the left pane, click the skin, then click Apply Skin. To return to the default “Library” view, click View on the menu, then select Library.
Refresh Windows Media Player, Adjust Windows Media Player Video Size
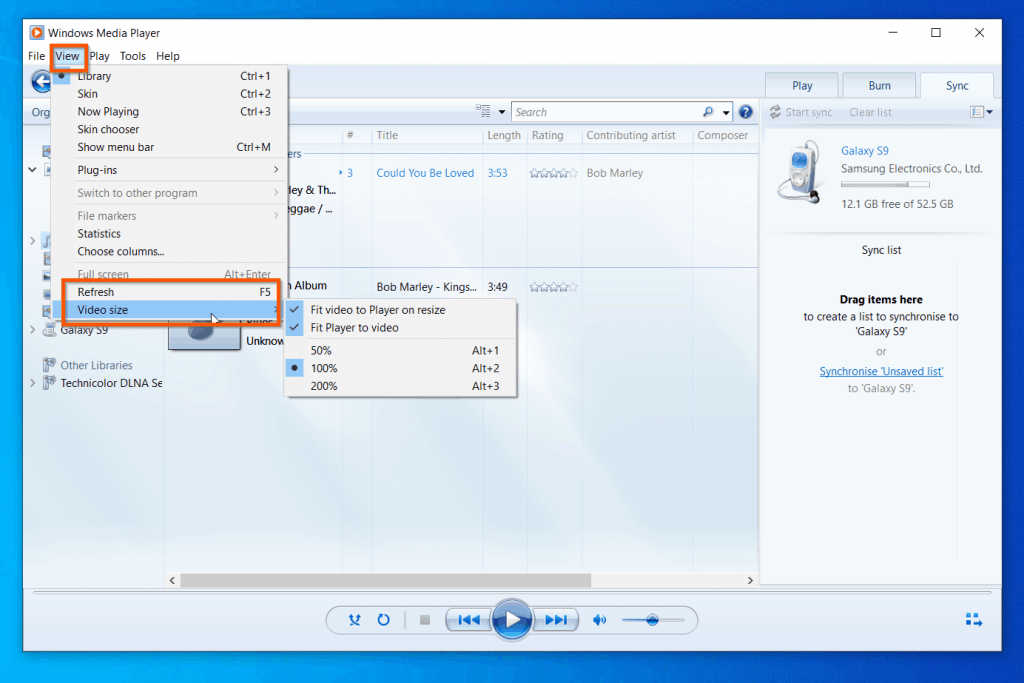
Before I move on from the “View” tab, I want to show you two more essential features of this tab – Refresh and Video size. Refresh does exactly what is says – refreshes the items in the Windows Media Player. You can also use the refresh keyboard shortcut – F5. Another hot Windows 10 Windows Media Player help topic is adjusting video sizes. See available options in the screenshot below.
Windows 10 Windows Media Player “Play” Menu
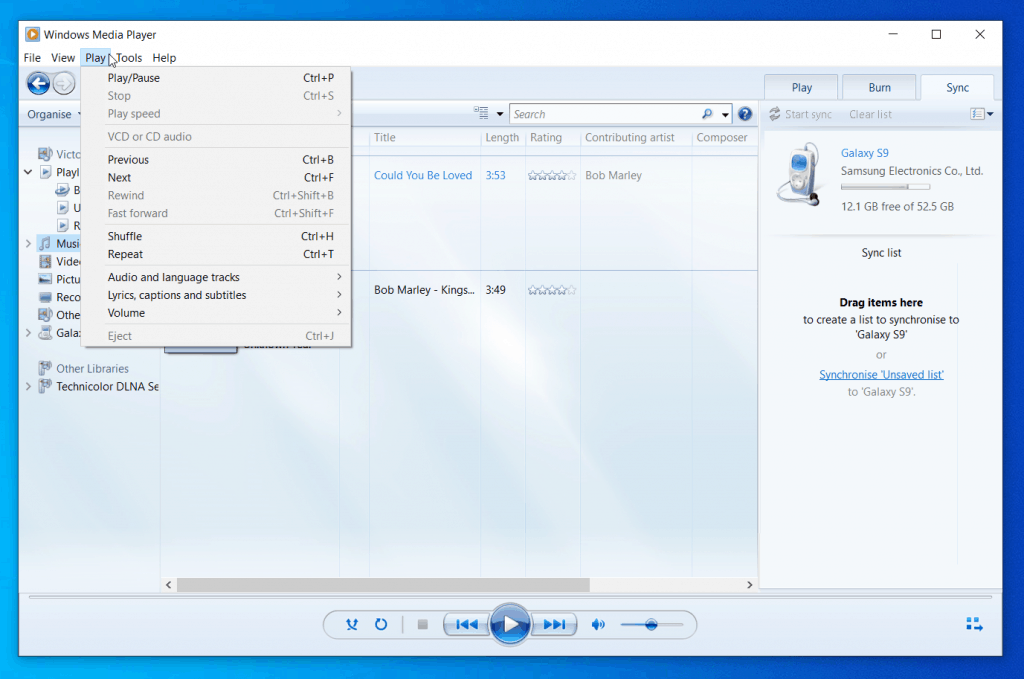
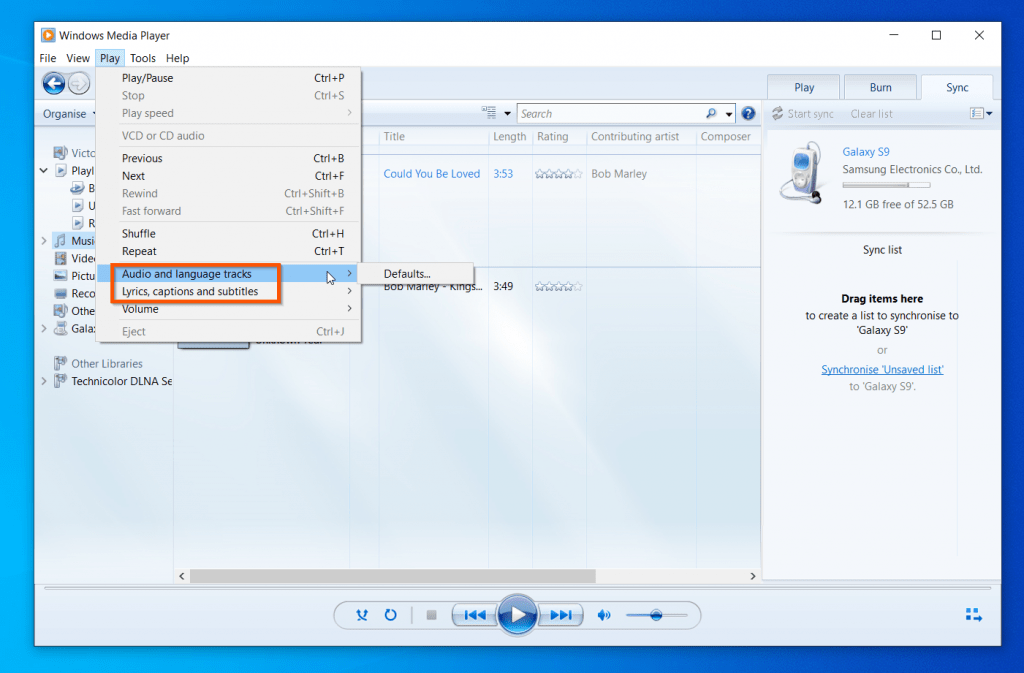
This section is still discussing “Working With Windows Media Player Menu”. The first two sub-sections covered the “File” and “View” menus. In this sub-section, I will be discussing another Windows 10 Windows Media Player topic – getting help with the “Play” menu! The simplicity of the “Play” menu does not minimize its importance. You can access the common media play buttons – like Play/Pause, Previous/Next – via the Play menu. However, the Play view has some other not-so-common buttons like Audio and language tracks and Lyrics, captions and subtitles settings. Finally, you can adjust volume, Shuffle, Repeat and Eject a CD/DVD from the Play menu.
Windows 10 Windows Media Player “Tools” Menu
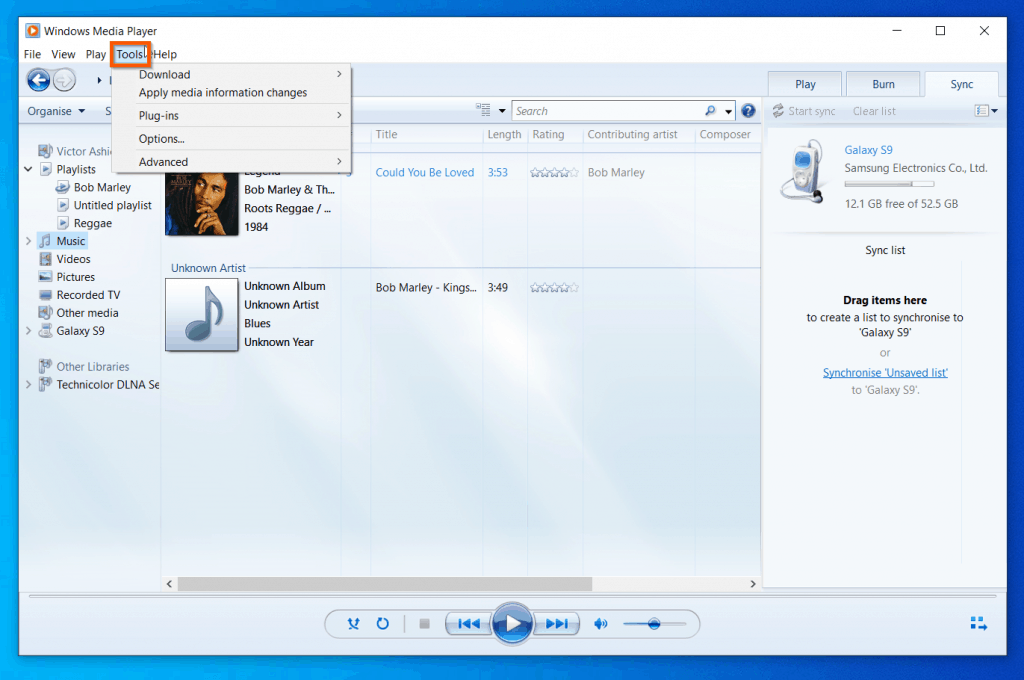
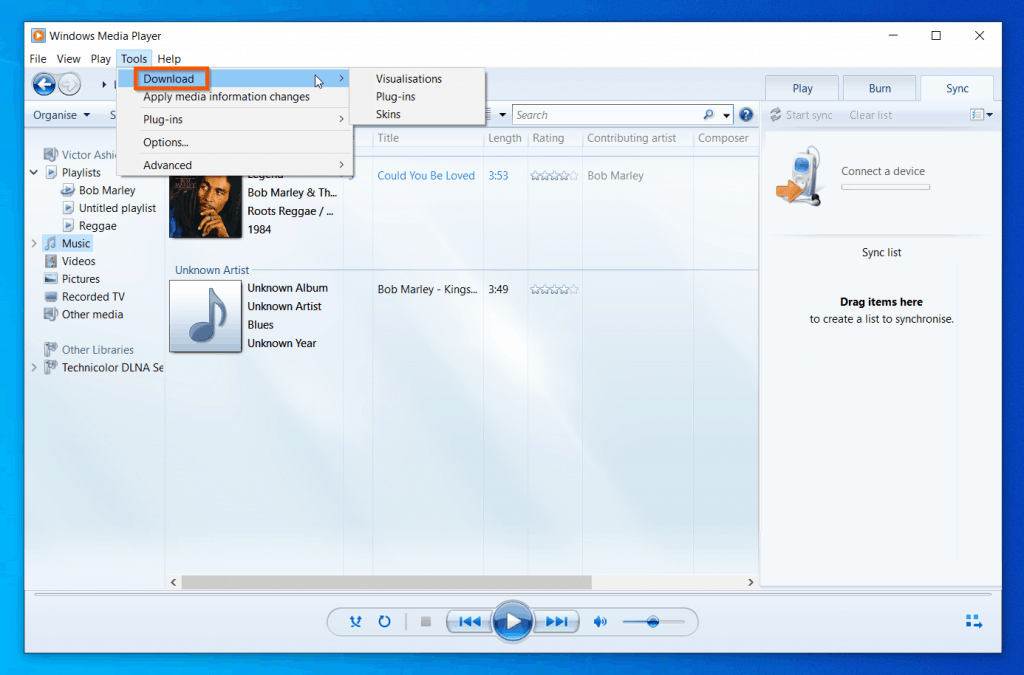
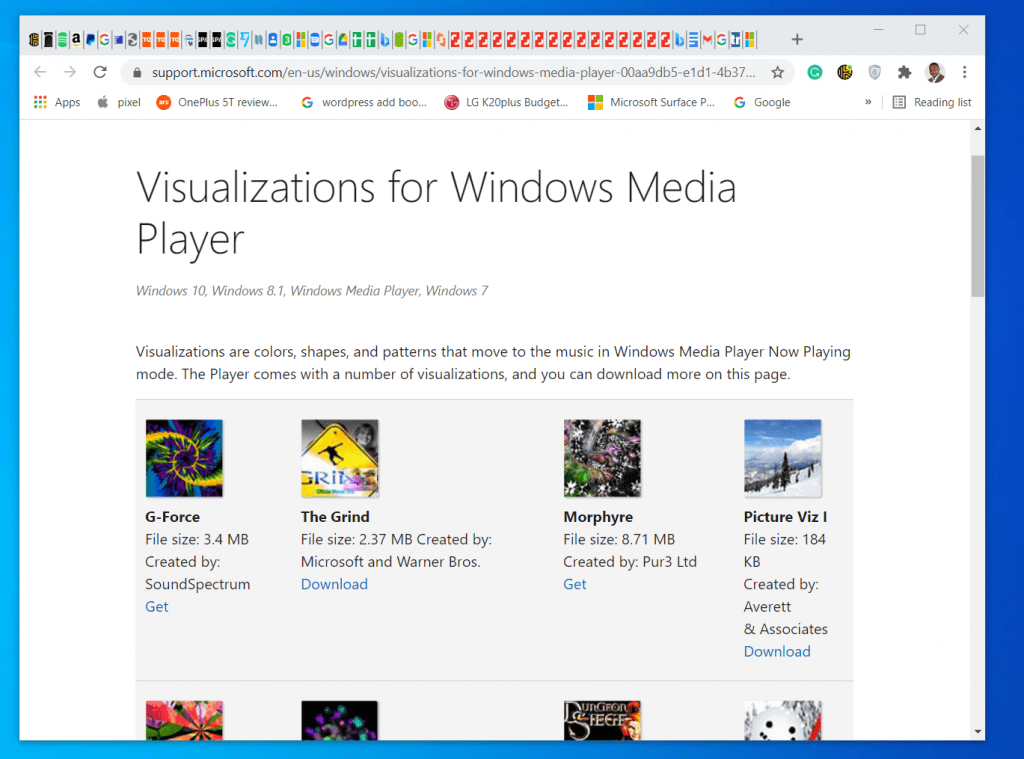
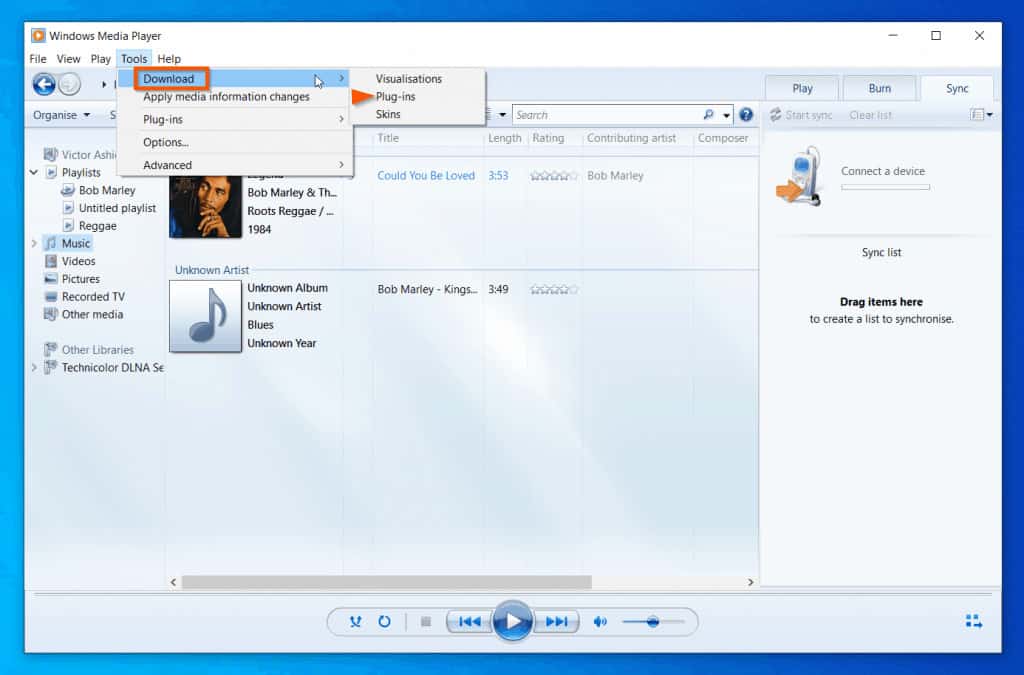
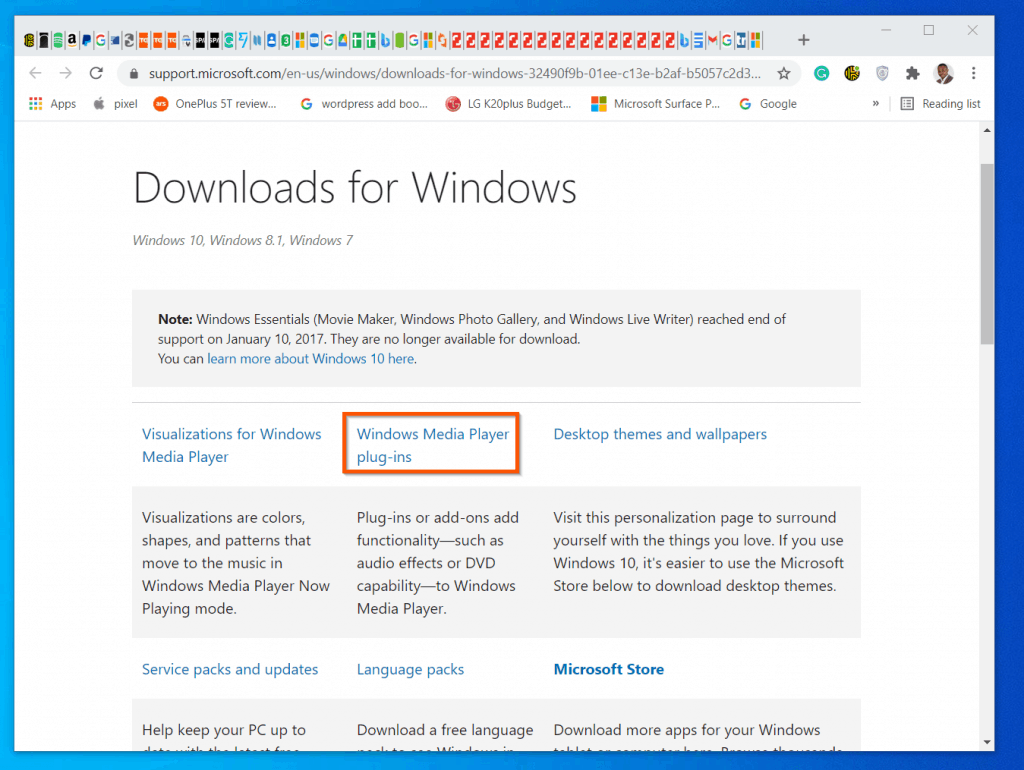
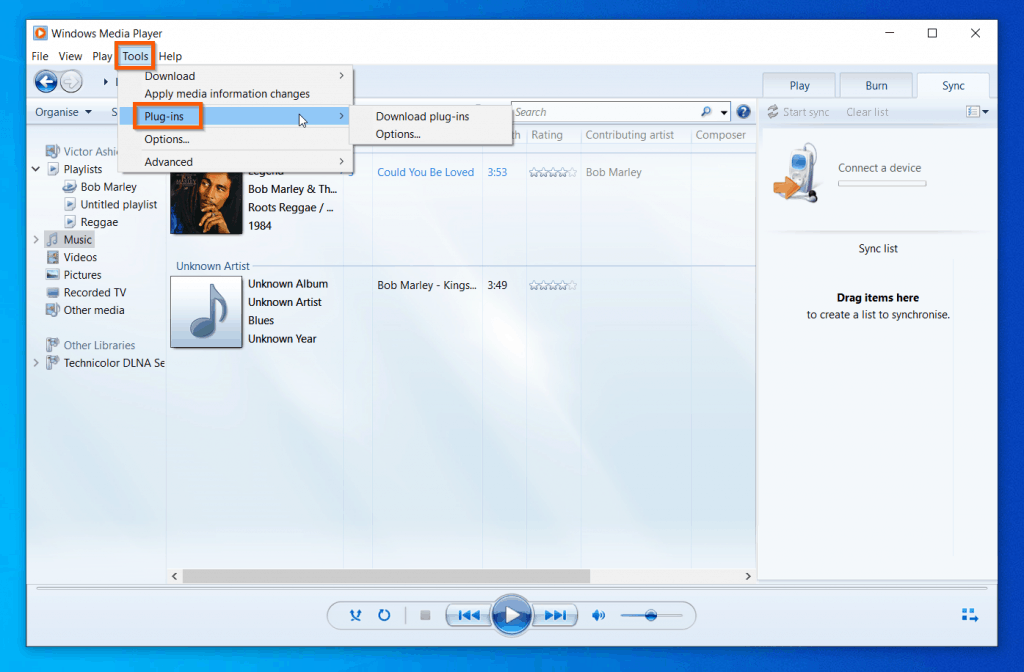
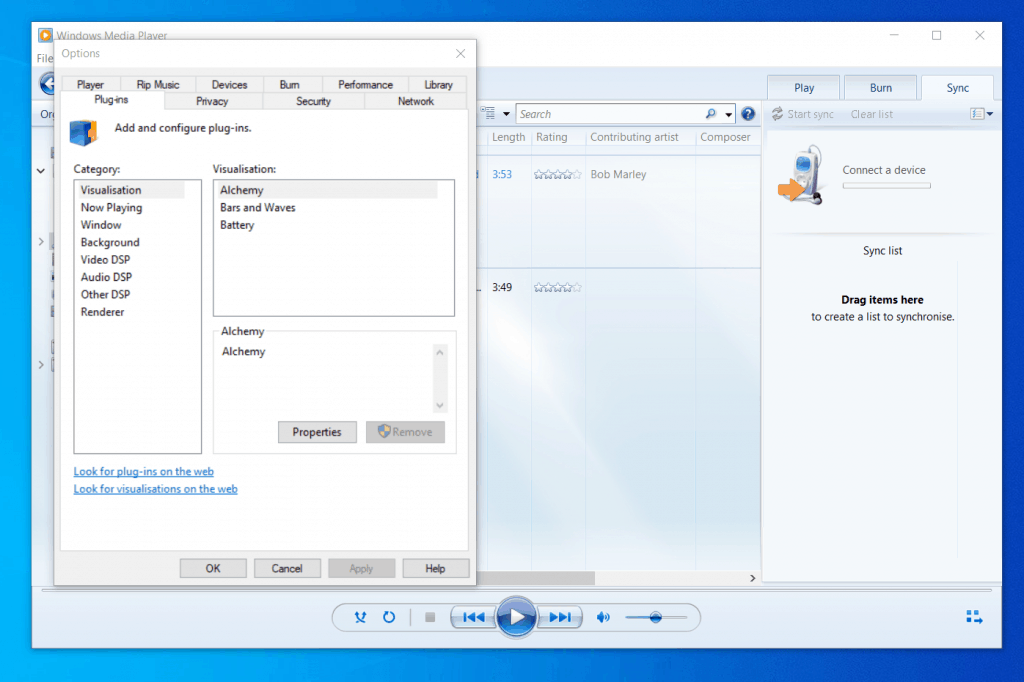
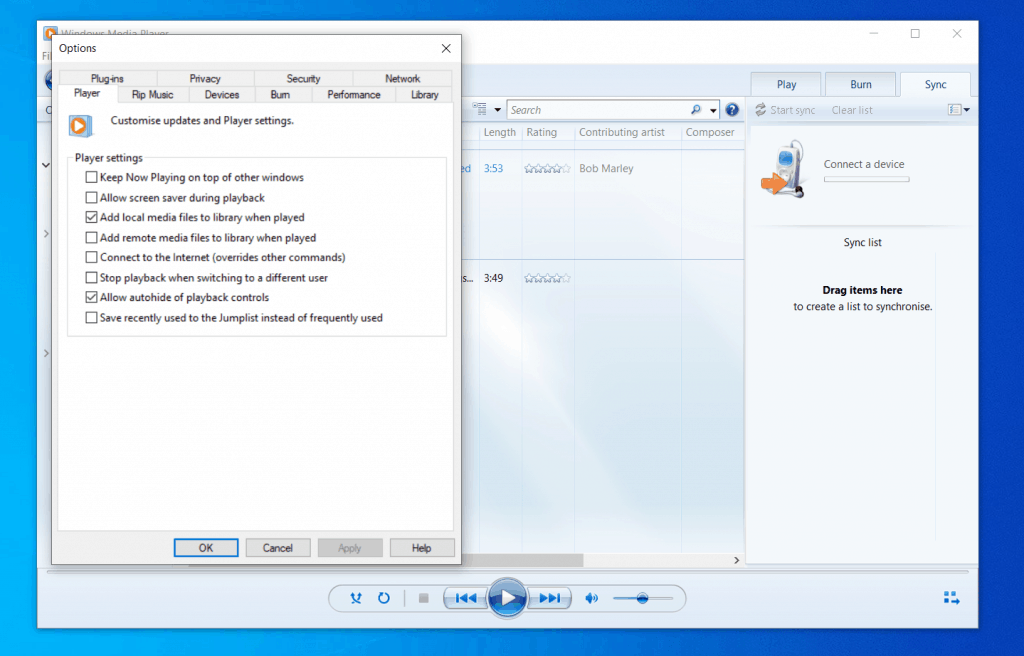
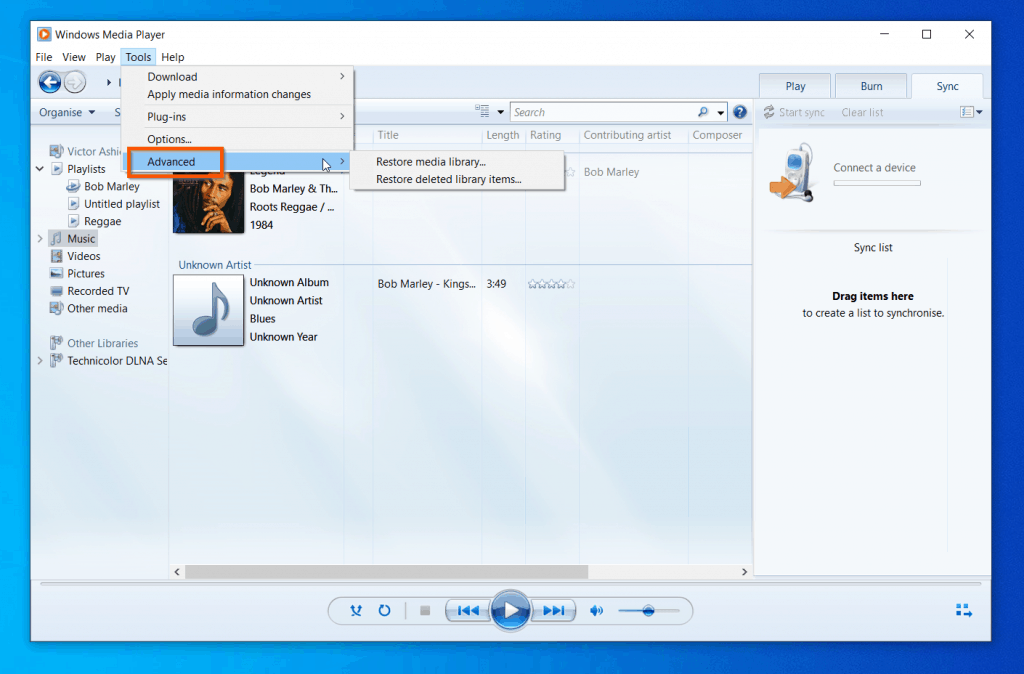
Still discuss the Windows Media Player menu, next is the all important “Tools” Menu. The first sub-menu in the “Tools” menu is Download. If you hover over the Download sub-menu, it displays Visualisations, Plug-ins, and Skins. When you click Visualisations, Windows Media Player opens the Visualizations for Windows Media Player (link opens in a new browser tab) page in your default browser. You can download additional Visualizations from this page. Furthermore, when you click Plug-ins, Windows Media Player opens the Downloads for Windows (link opens in a new browser tab) page in your default browser. To download plug-ins, click the Windows Media Player plug-ins (link opens in a new browser tab) link. Moving on, the next Tools menu sub-menu worth mentioning is the Plug-ins sub-menu. This sub-menu has two options – Download plug-ins (which takes you to the same link discussed earlier), and Options. Use the Plug-ins Options to configure plug-ins and Visualisations (discussed earlier in this sub-section). There are two more important items in the “Tools” menu – Options and Advanced. Click Options to change your Windows Media Player settings. To see what you can change, click each tab. Finally, the Advanced sub-menu allows you to Restore media library and Restore deleted library items.
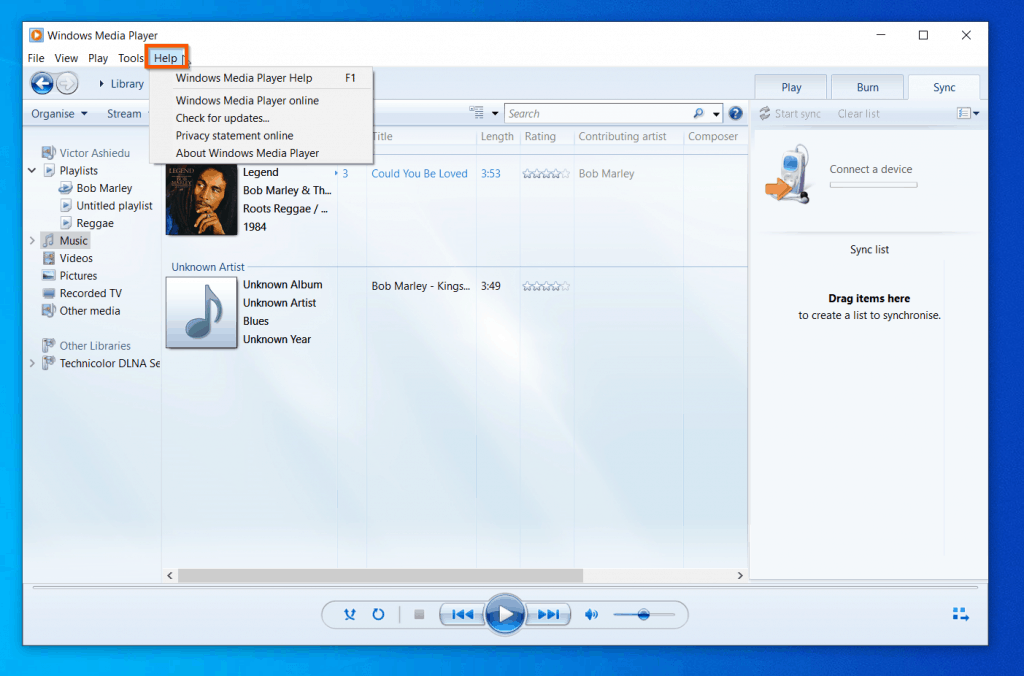
Windows 10 Windows Media Player “Help” Menu
The final item in the Windows Media Player menu is the Help menu. You can play around the items in the Windows 10 Windows Media Player “Help” menu to get additional help.
Get Help With Windows Media Player In Windows 10: Windows Media Player Shortcuts
You can perform most of the actions discussed so far in this guide with keyboard shortcuts. The table below is a full list of the Windows Media Player keyboard Shortcuts: This section answers frequently asked questions about Windows Media Player In Windows 10. I hope you found this Windows 10 guide helpful. If you did, kindly spare 2 minutes to share your experience with our community at Itechguides Community Forum. Moreover, if you have any questions regarding this article or if the steps did not fix your problem, you can also post your question at Itechguides Community Forum. Our team and other community members will come back to you with a fix as soon as possible. Finally, for more Windows 10 Itechguides, visit our Windows 10 How-To page. You may also find the following Windows 10 help guides helpful: Get Help With Notepad In Windows 10: Your Ultimate GuideGet Help With Paint In Windows 10: Your Ultimate Paint GuideHelp With WordPad In Windows 10: Your Ultimate WordPad GuideWindows 10 Disk Management: Your Ultimate Disk Management GuideDiskPart Command Simplified With Examples When I edit the audio file with a different name and then burn that audio file to a CD the name change does not appear