Now, this brings a question is mind i.e. How to Check if Virtualization is Enabled on Windows 11 PC? To get an answer to this question, you need to boot the PC into BIOS and from there you will easily find out if it’s enabled or not. What if I say, you can also check if Virtualization is Enabled on Windows 11 PC without going to BIOS, it will be great right? And if you landed on this blog post, then definitely you want to learn the same thing, right?
How to Check If Virtualization is Enabled in windows 11 without bios
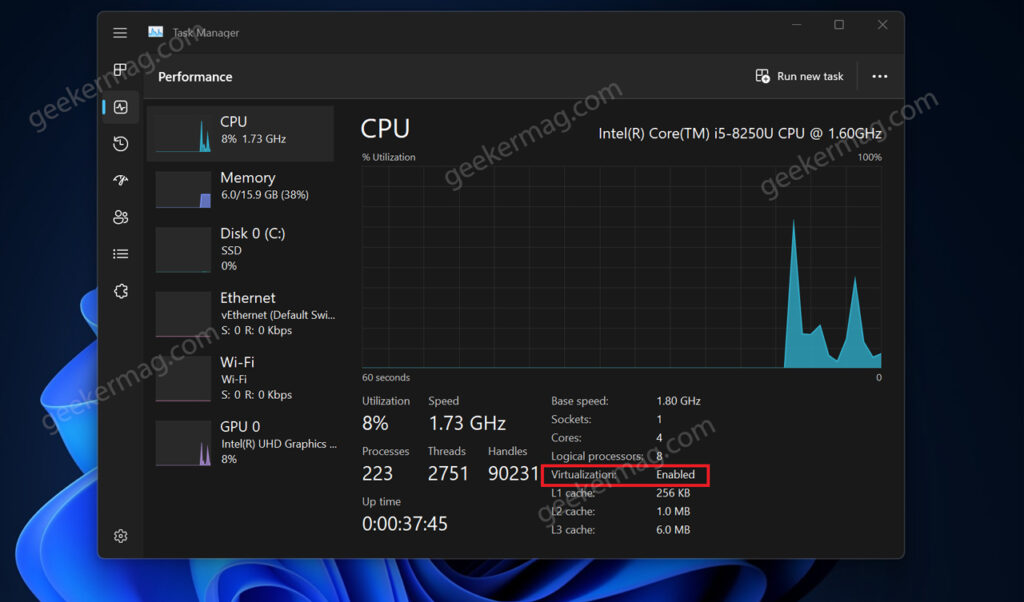
To help you out, I decided to cover this blog post in which you will learn the super easy way to find the Virtualization feature status on Windows 11 PC. Here’s what you need to do: Launch Task Manager on your PC either by pressing CTRL + SHIFT + ESC combination or from the Taskbar. In the Task Manager, Switch to the Performance tab, and then in the bottom right corner, you will find an entry named Virtualization. If Virtualization is set to Enable, then this means the Virtualization feature is enabled. If Virtualization is set to Disable, then this means the Virtualization feature is disabled. And you need to enter bios on your PC and enable it. In case, the Virtualization entry is missing, then your PC doesn’t support Virtualization and as a result, you won’t be able to enable Hyper-V Manager on your PC. As simple as that! In case, you know any other way How to Check if Virtualization is Enabled in Windows 11 PC, then feel free to share in the comments.